I had a space in the living room that was a little empty and for a long time I have been thinking about what to do with so much plastic that we throw away every day.. Combining these two ideas, it occurred to me to make a pouf with bottles and cloth., This way I could fill the space in the living room with something recycled and made with my own hands.
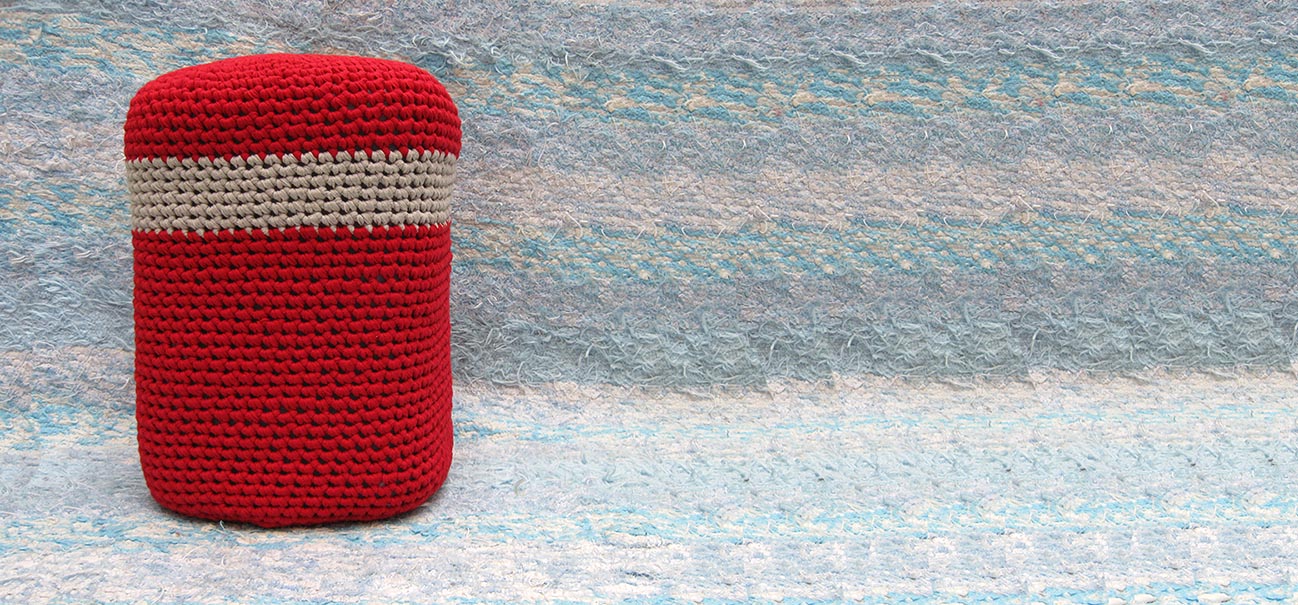
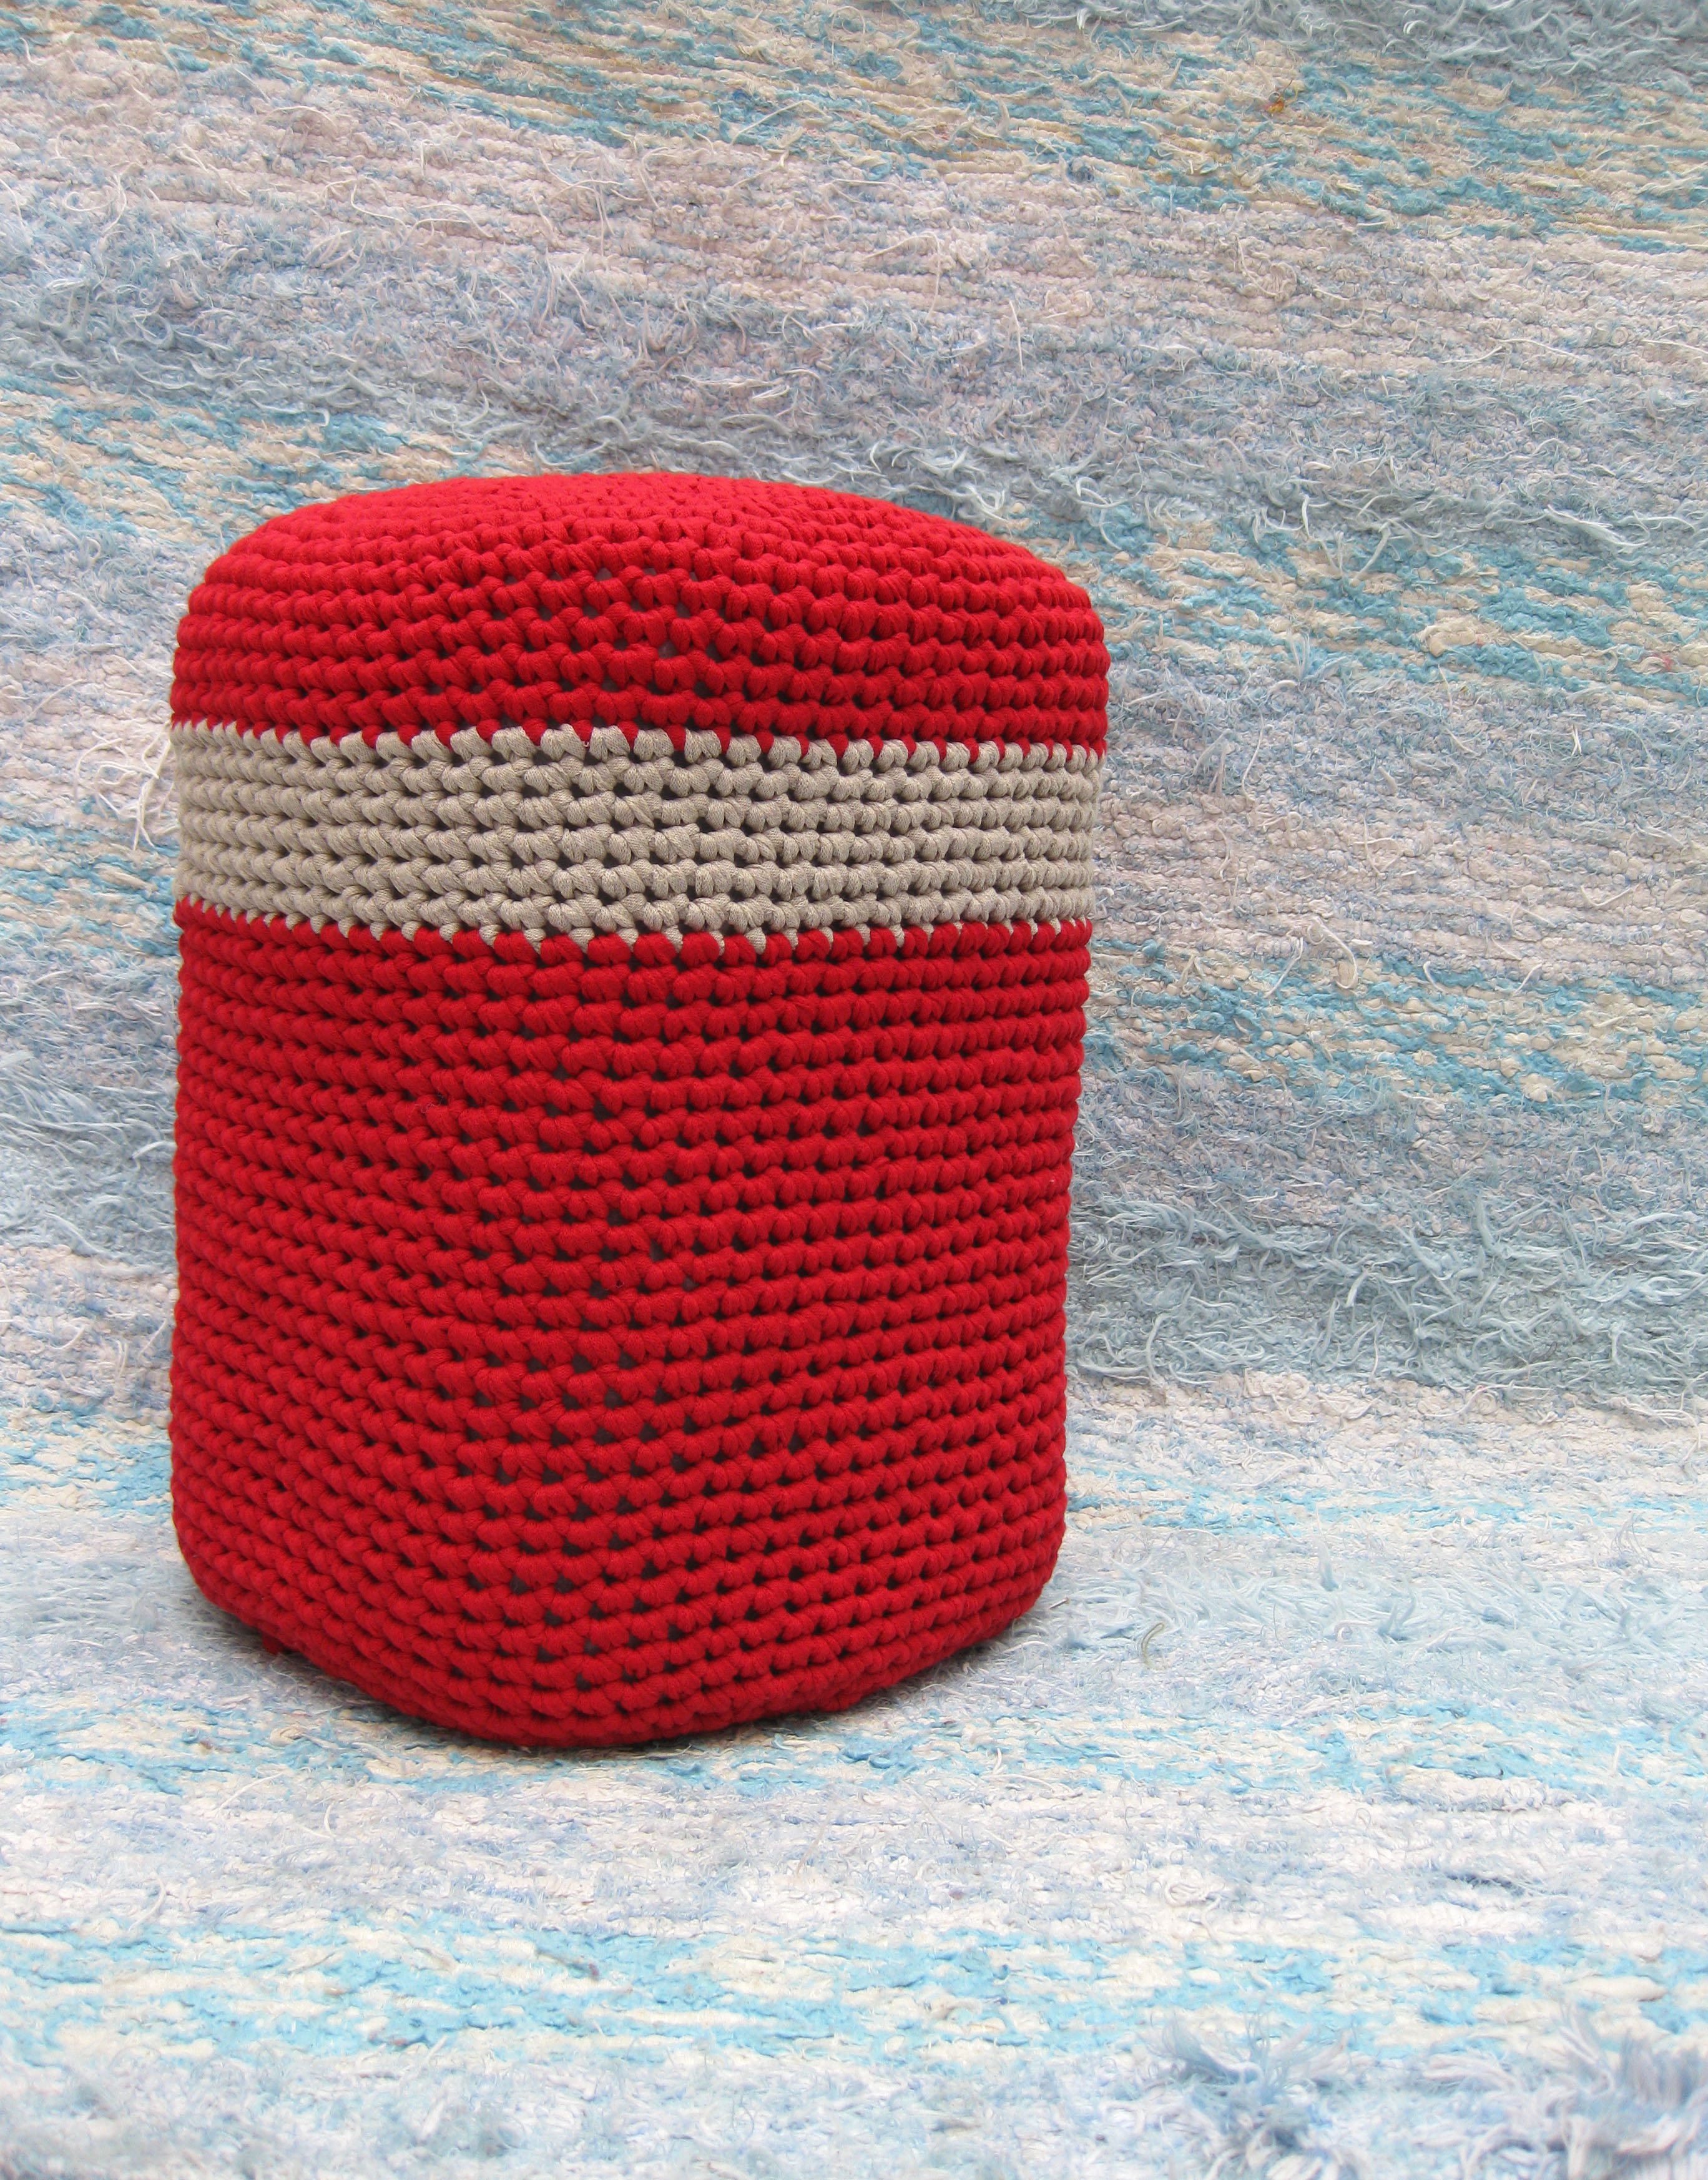
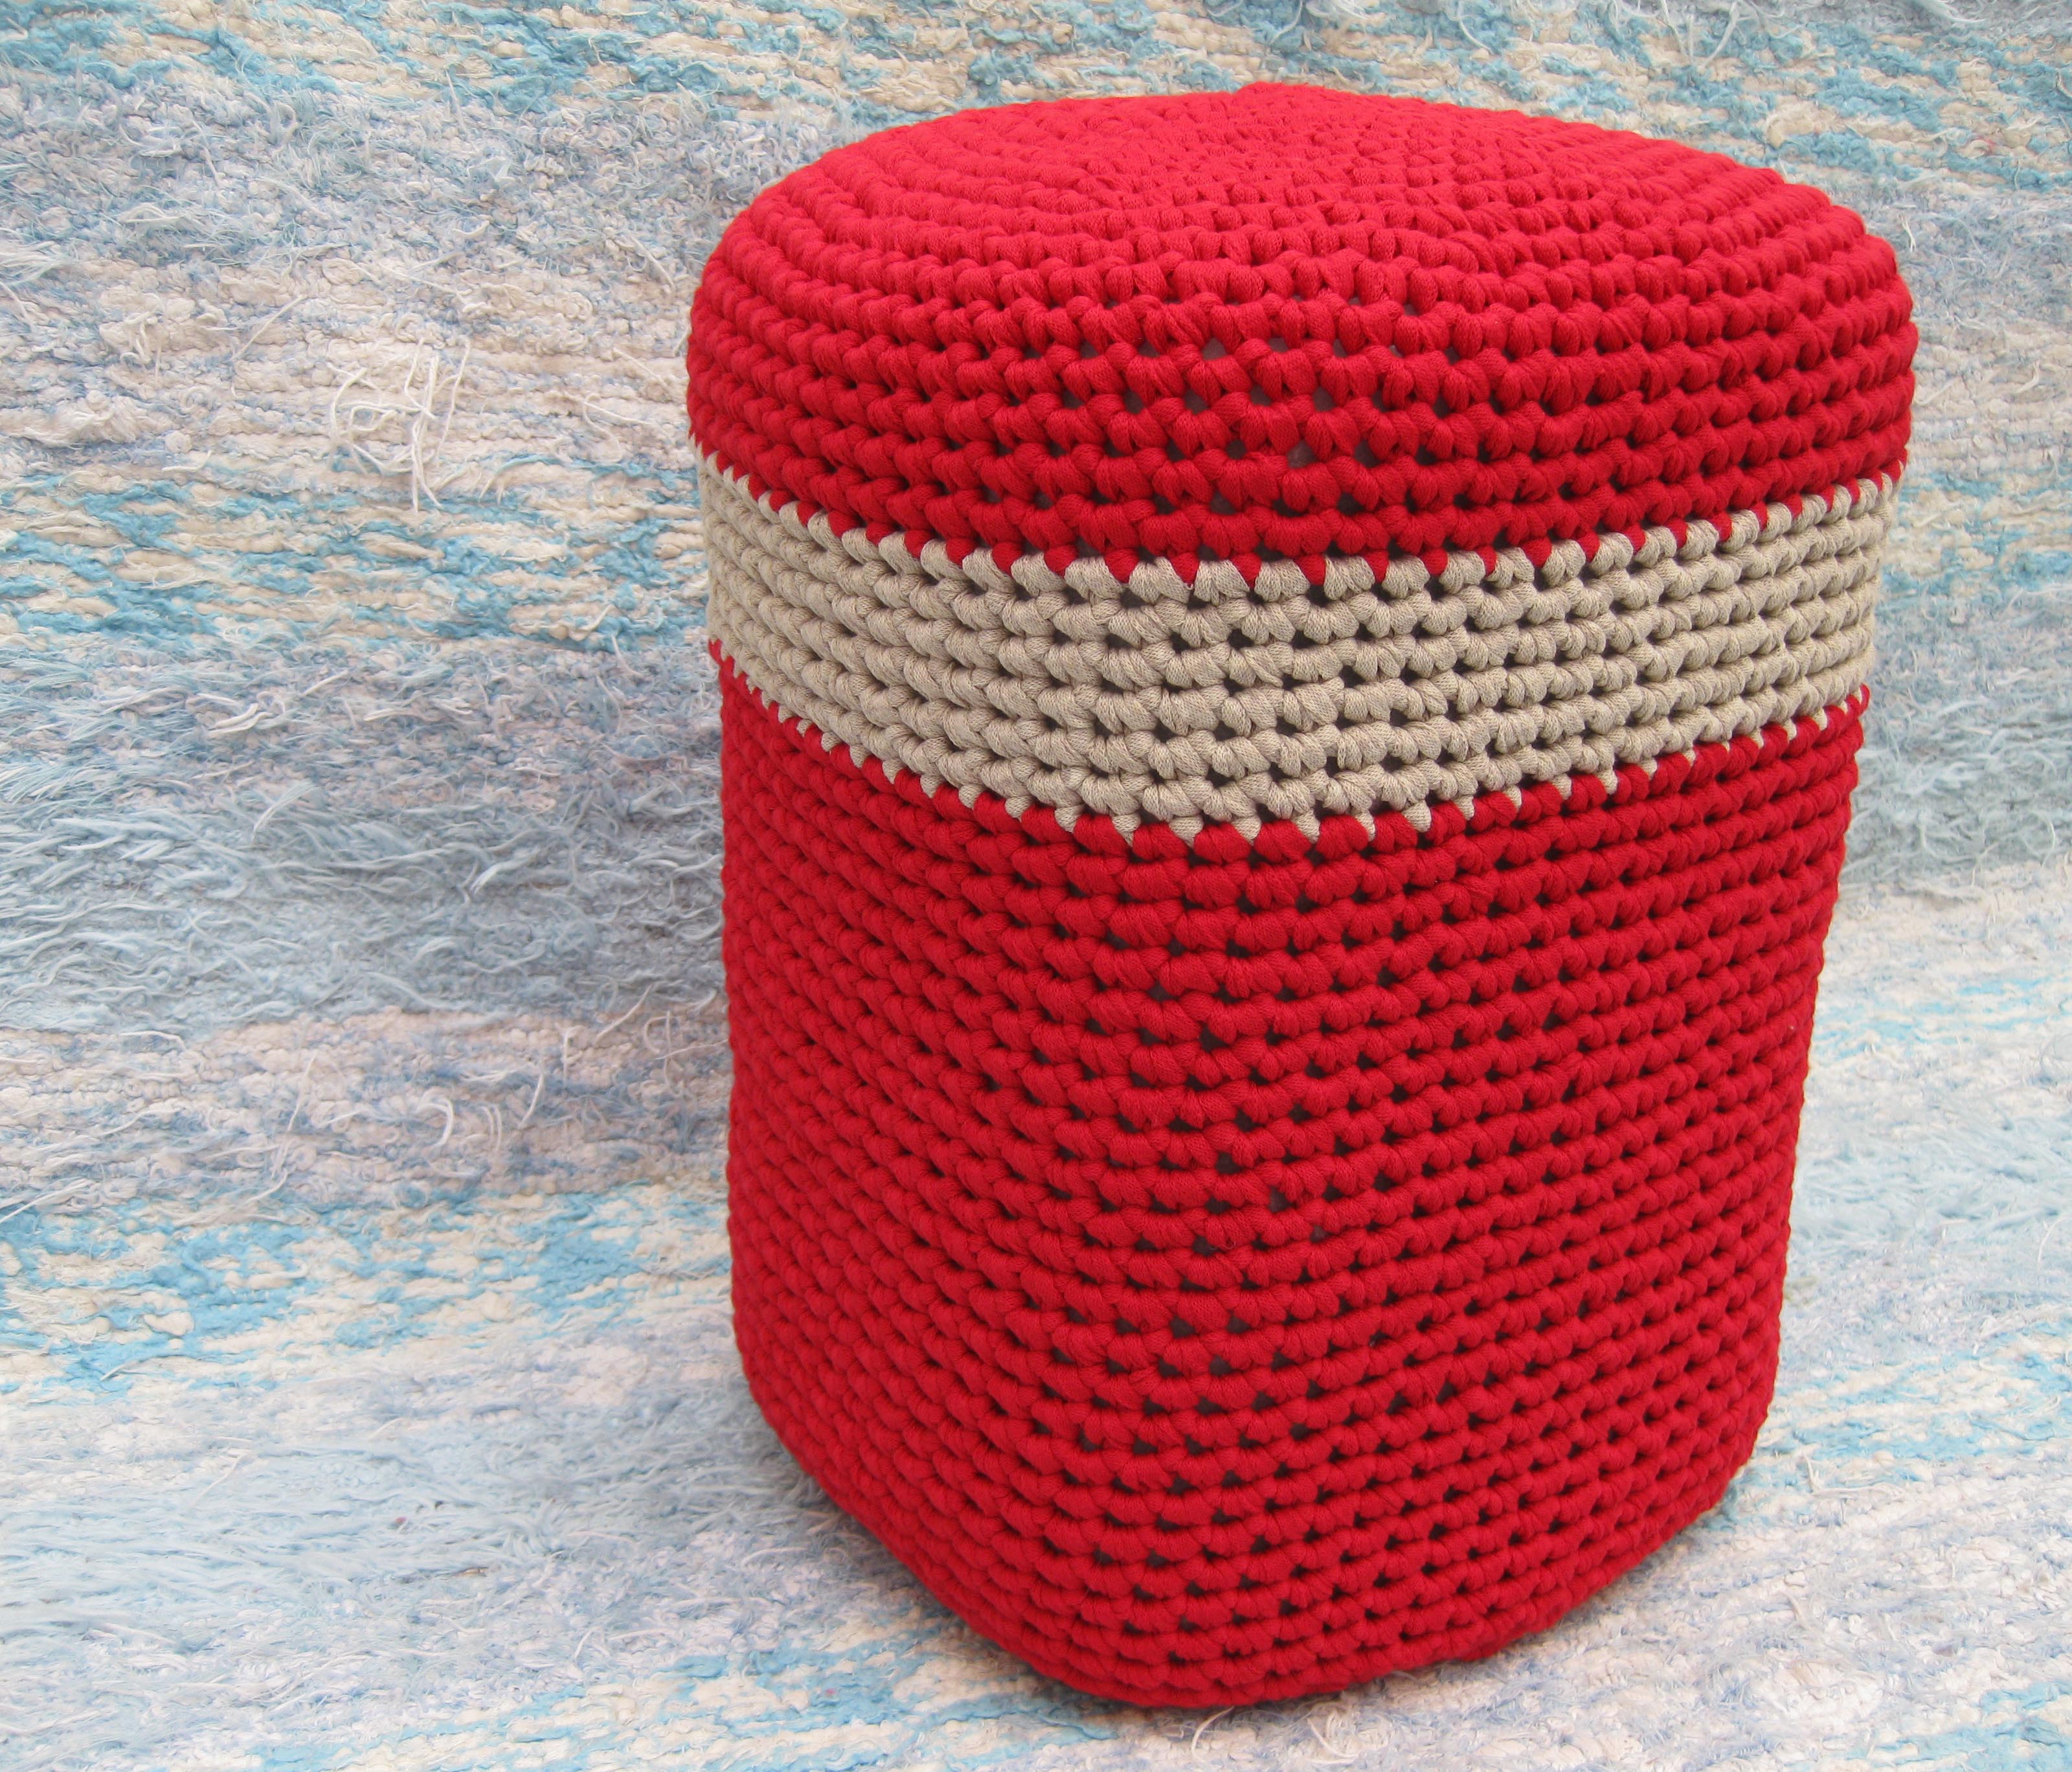
So today I will tell you how to make, step by step, an entirely handmade pouf or stool.. The filling is mainly made of recycled plastic bottles and the cover is crocheted with cloth. Big Ribbon de Katia.
The measurements of this pouf are 45 cm high by 30 cm wide.
Interior materials:
-27 Coca-Cola type plastic bottles.
-Wadding for quilting.
-packing tape.
-Two sheets of cardboard.
Achievement:
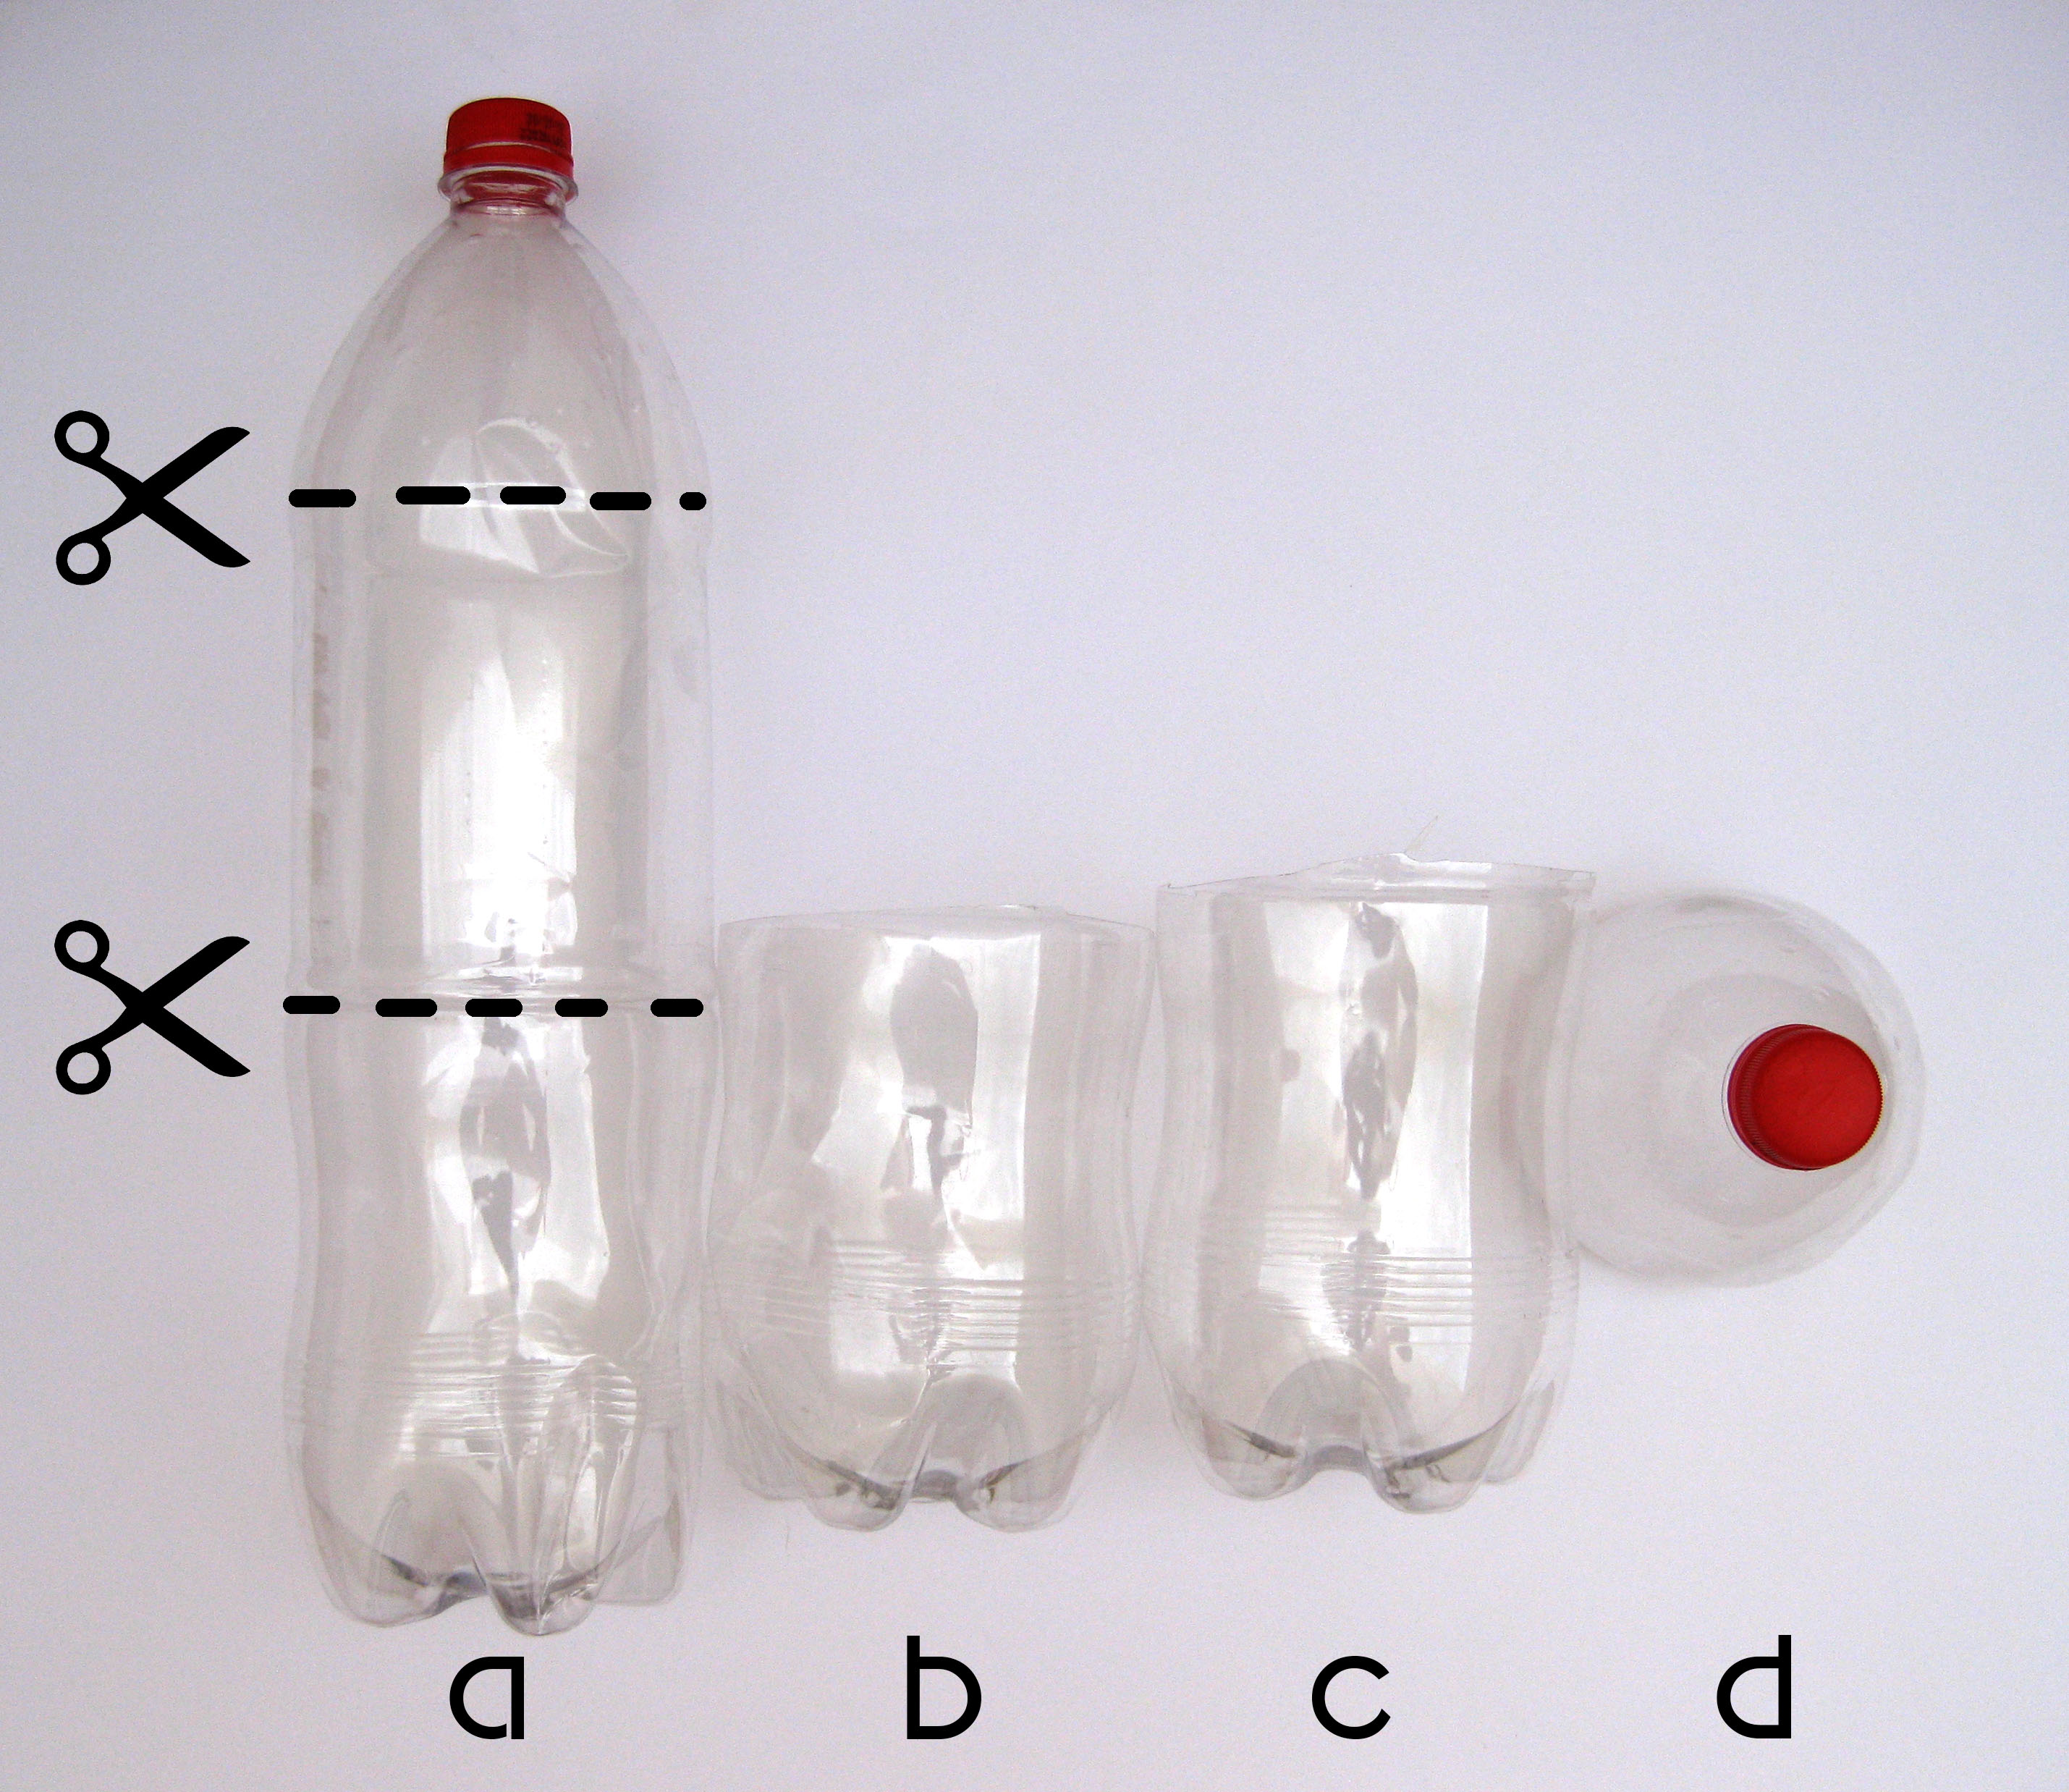
First of all let's create 9 columns with 27 plastic bottles strong enough to withstand the butt of an adult person. The assembly of the columns will be carried out in the following way:
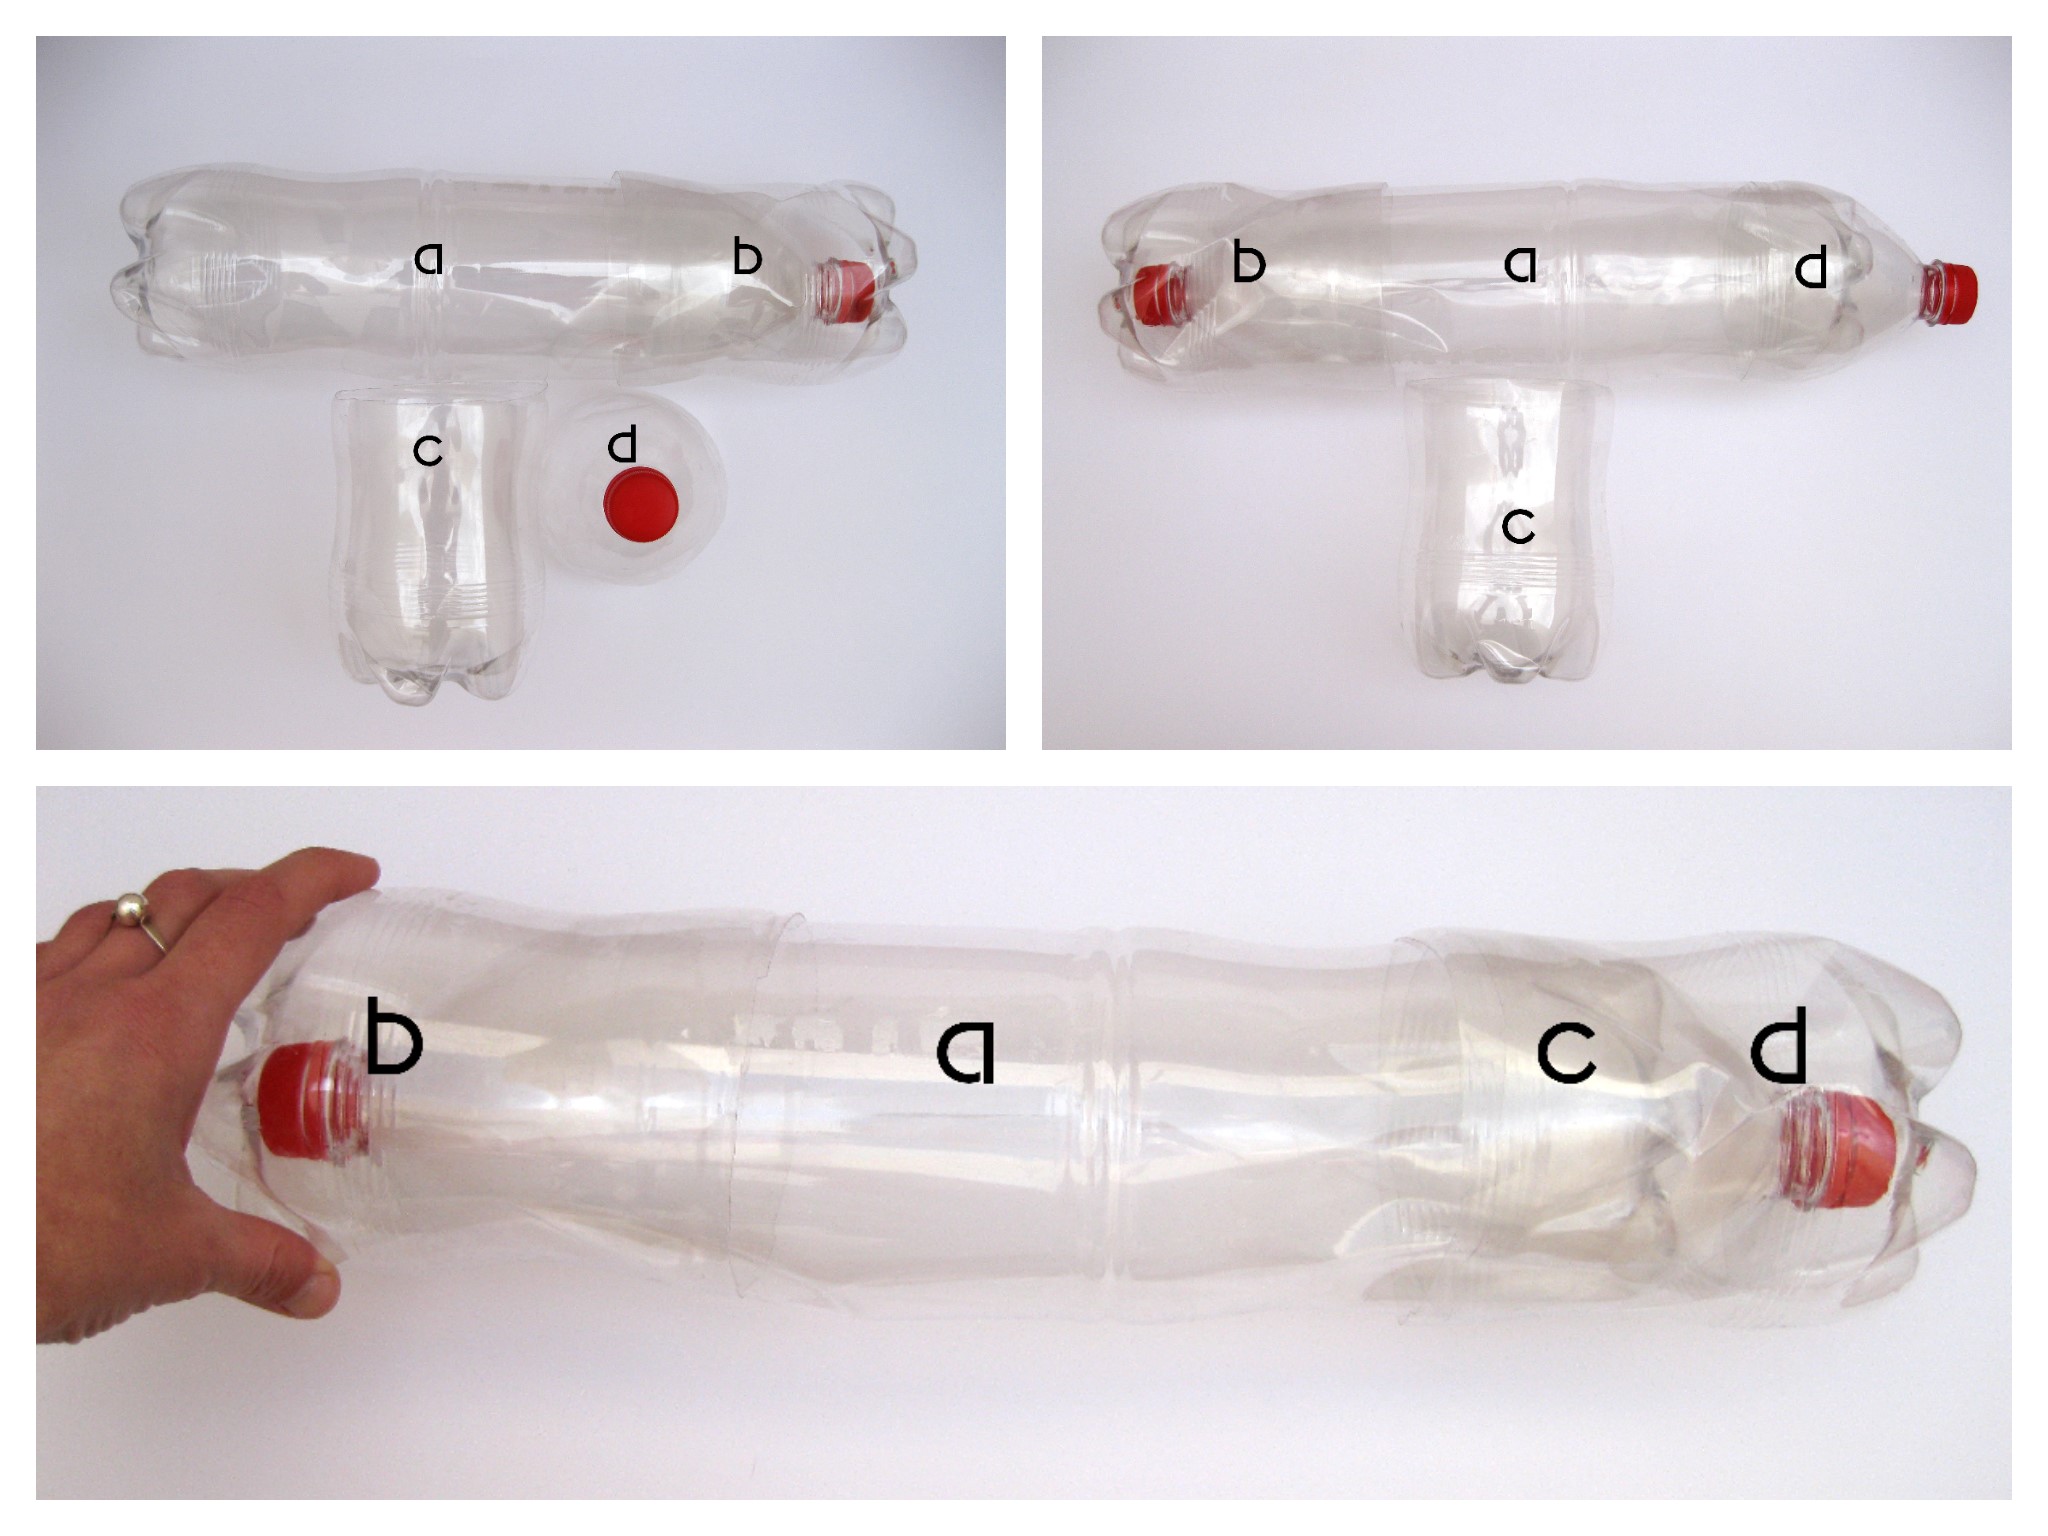
To assemble a plastic column we need 3 bottles, of which one will remain whole (a), another we will cut at the base (b) and from the last one we will need the base (c) and the plug area (d).
The next steps are:
- Place the base (b) in the cap area of the entire bottle (a).
- Place the cap (d) at the base of the entire bottle (a).
- Place the base (c) where is the cap (d).
Once we have the 9 columns, we will place them in 3 rows of 3 using the packing tape to keep them securely in place. Then we will place the cardboard sheets on both the top and bottom of the bottles and we will also secure them with the packing tape..
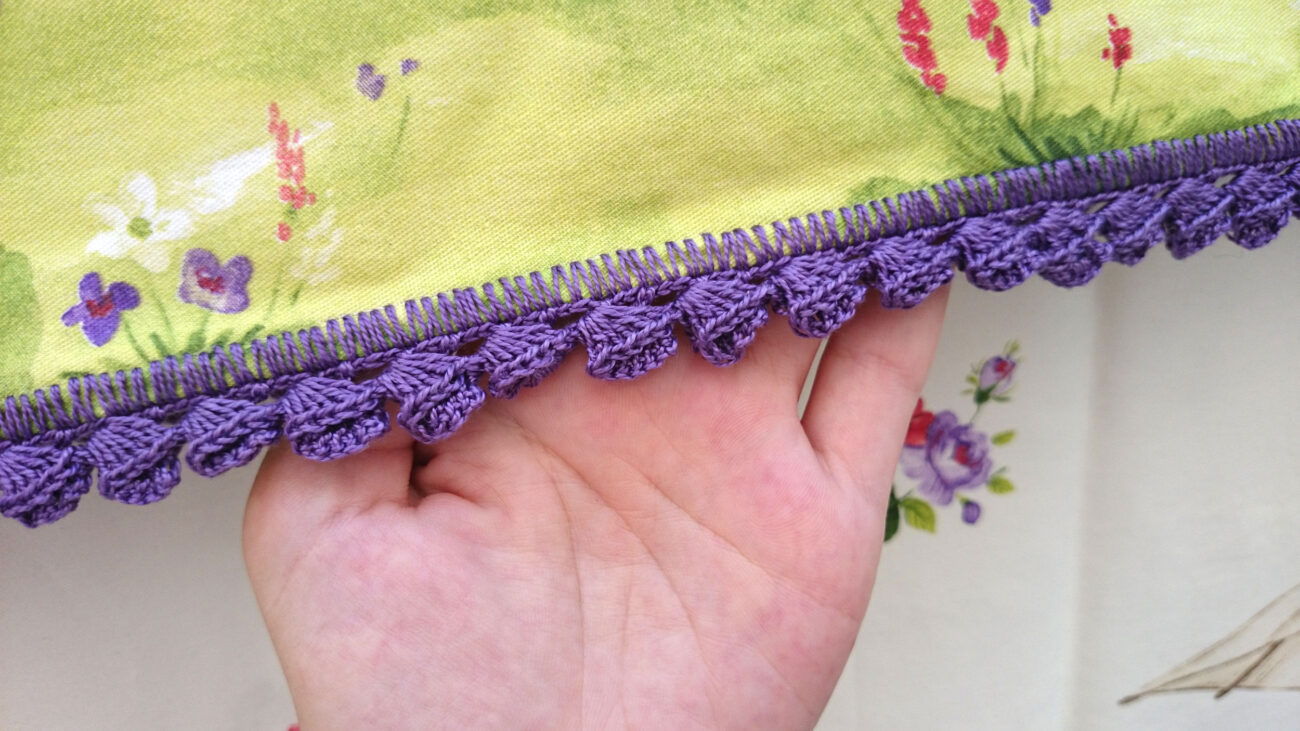
The last step before making the cloth cover is to cover everything with batting and sew it so that it fits well.. At the top I have placed 3 layers of batting to make it softer.
Now yes, Everything is ready to start knitting a beautiful cover for our new seat..
Materials for the cover:
-number crochet hook 9.
-6 balls of Trapillo Big Ribbon by Katia.
-zipper 70 cm.
Achievement:
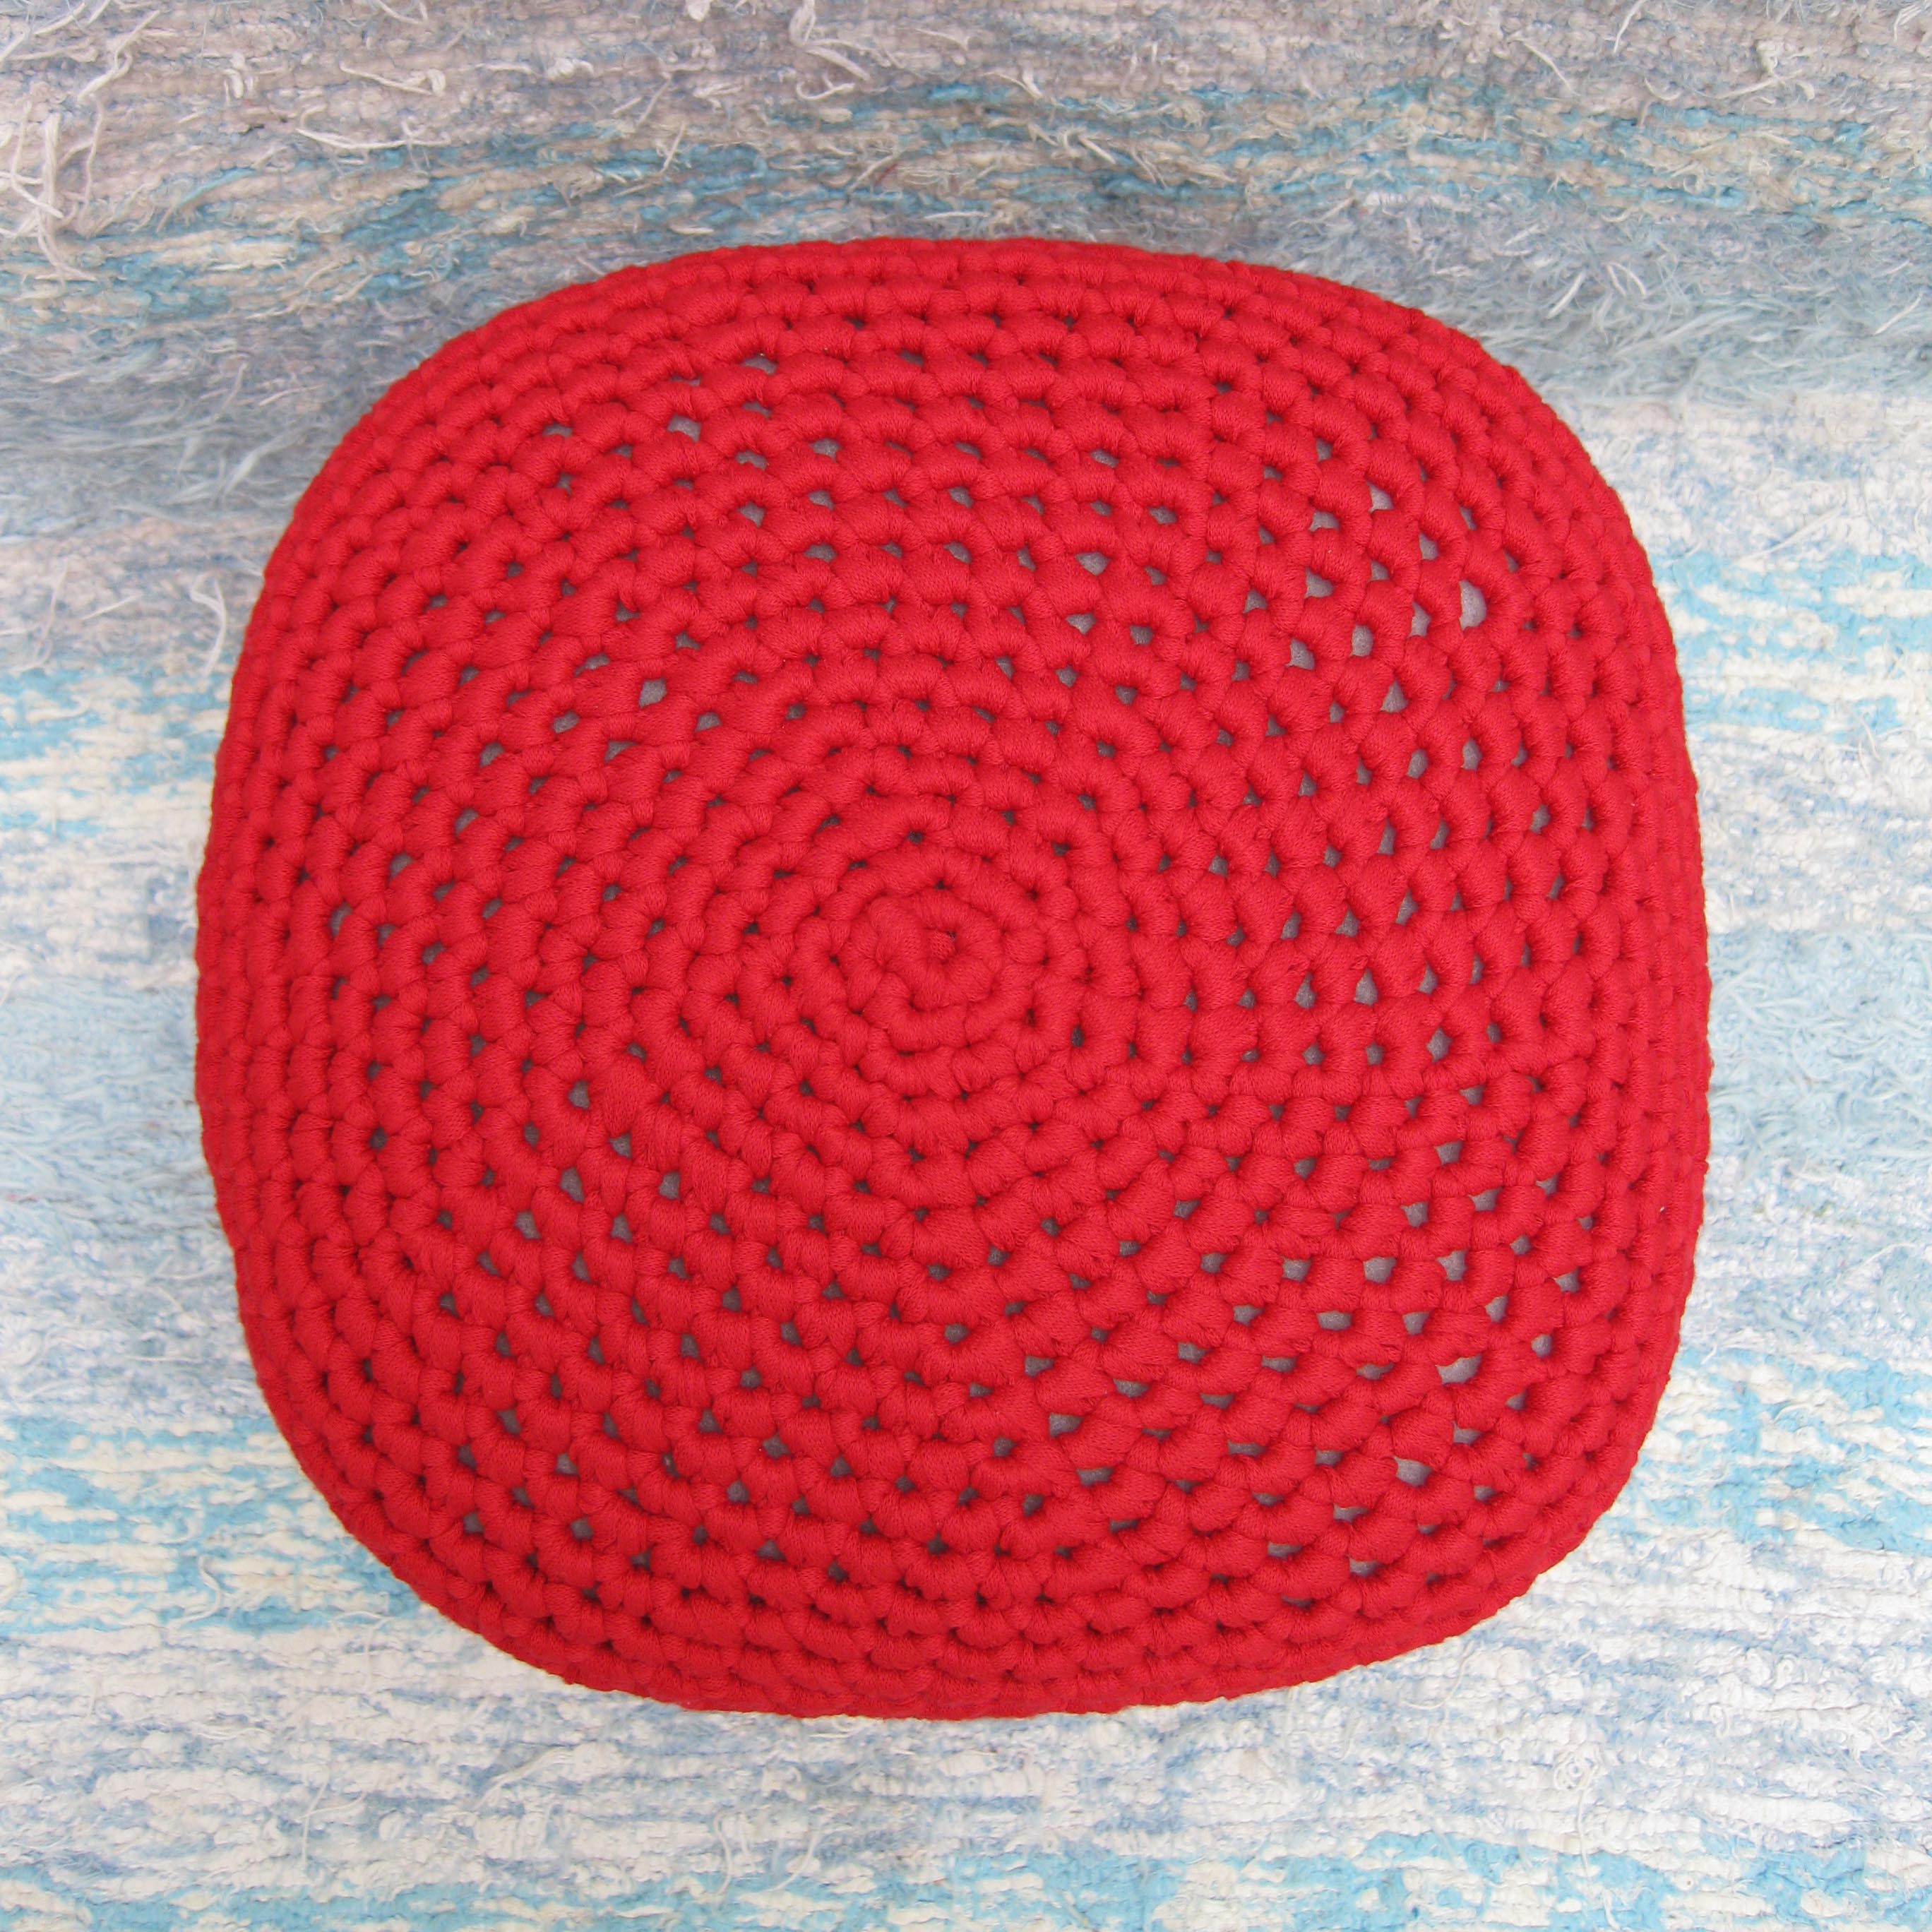
V1: magic ring 5 points.
V2: 1 Increase in each point (10p).
V3: 1 Pb and an increase throughout the round (15 p).
V4: 2 Pb and an increase throughout the round (20 p).
V5: 3 Pb and an increase throughout the round (25 p).
V6: 4 Pb and an increase throughout the round (30 p).
V7: 5 Pb and an increase throughout the round (35 p).
V8: 6 Pby an increase throughout the round (40 p).
V9: 7 Pb and an increase throughout the round (45 p).
V10: 8 Pb and an increase throughout the round (50 p).
V11: 9 Pb and an increase throughout the round (55 p).
V12: 10 Pb and an increase throughout the round (60 p).
V13: 6 Pb, an increase, 11 Pb, an increase, 11 Pb, an increase, 11 Pb, an increase, 11 Pb, an increase, 5 Pb (65 p).
V14: 6 Pb, an increase, 12 Pb, an increase, 12 Pb, an increase, 12 Pb, an increase, 12 Pb, an increase, 6 Pb (70 p).
We already have the seating area finished. We will continue knitting everything in low stitch to keep up with the height.
V15-50: Pb throughout the round (70 p). To make the band a different color, like this, change the color of the wrap cloth 20 to the 26.
V51: 12 Pb, a decrease throughout the round (65p).
V52: 11 Pb, a decrease throughout the round and close(60p).
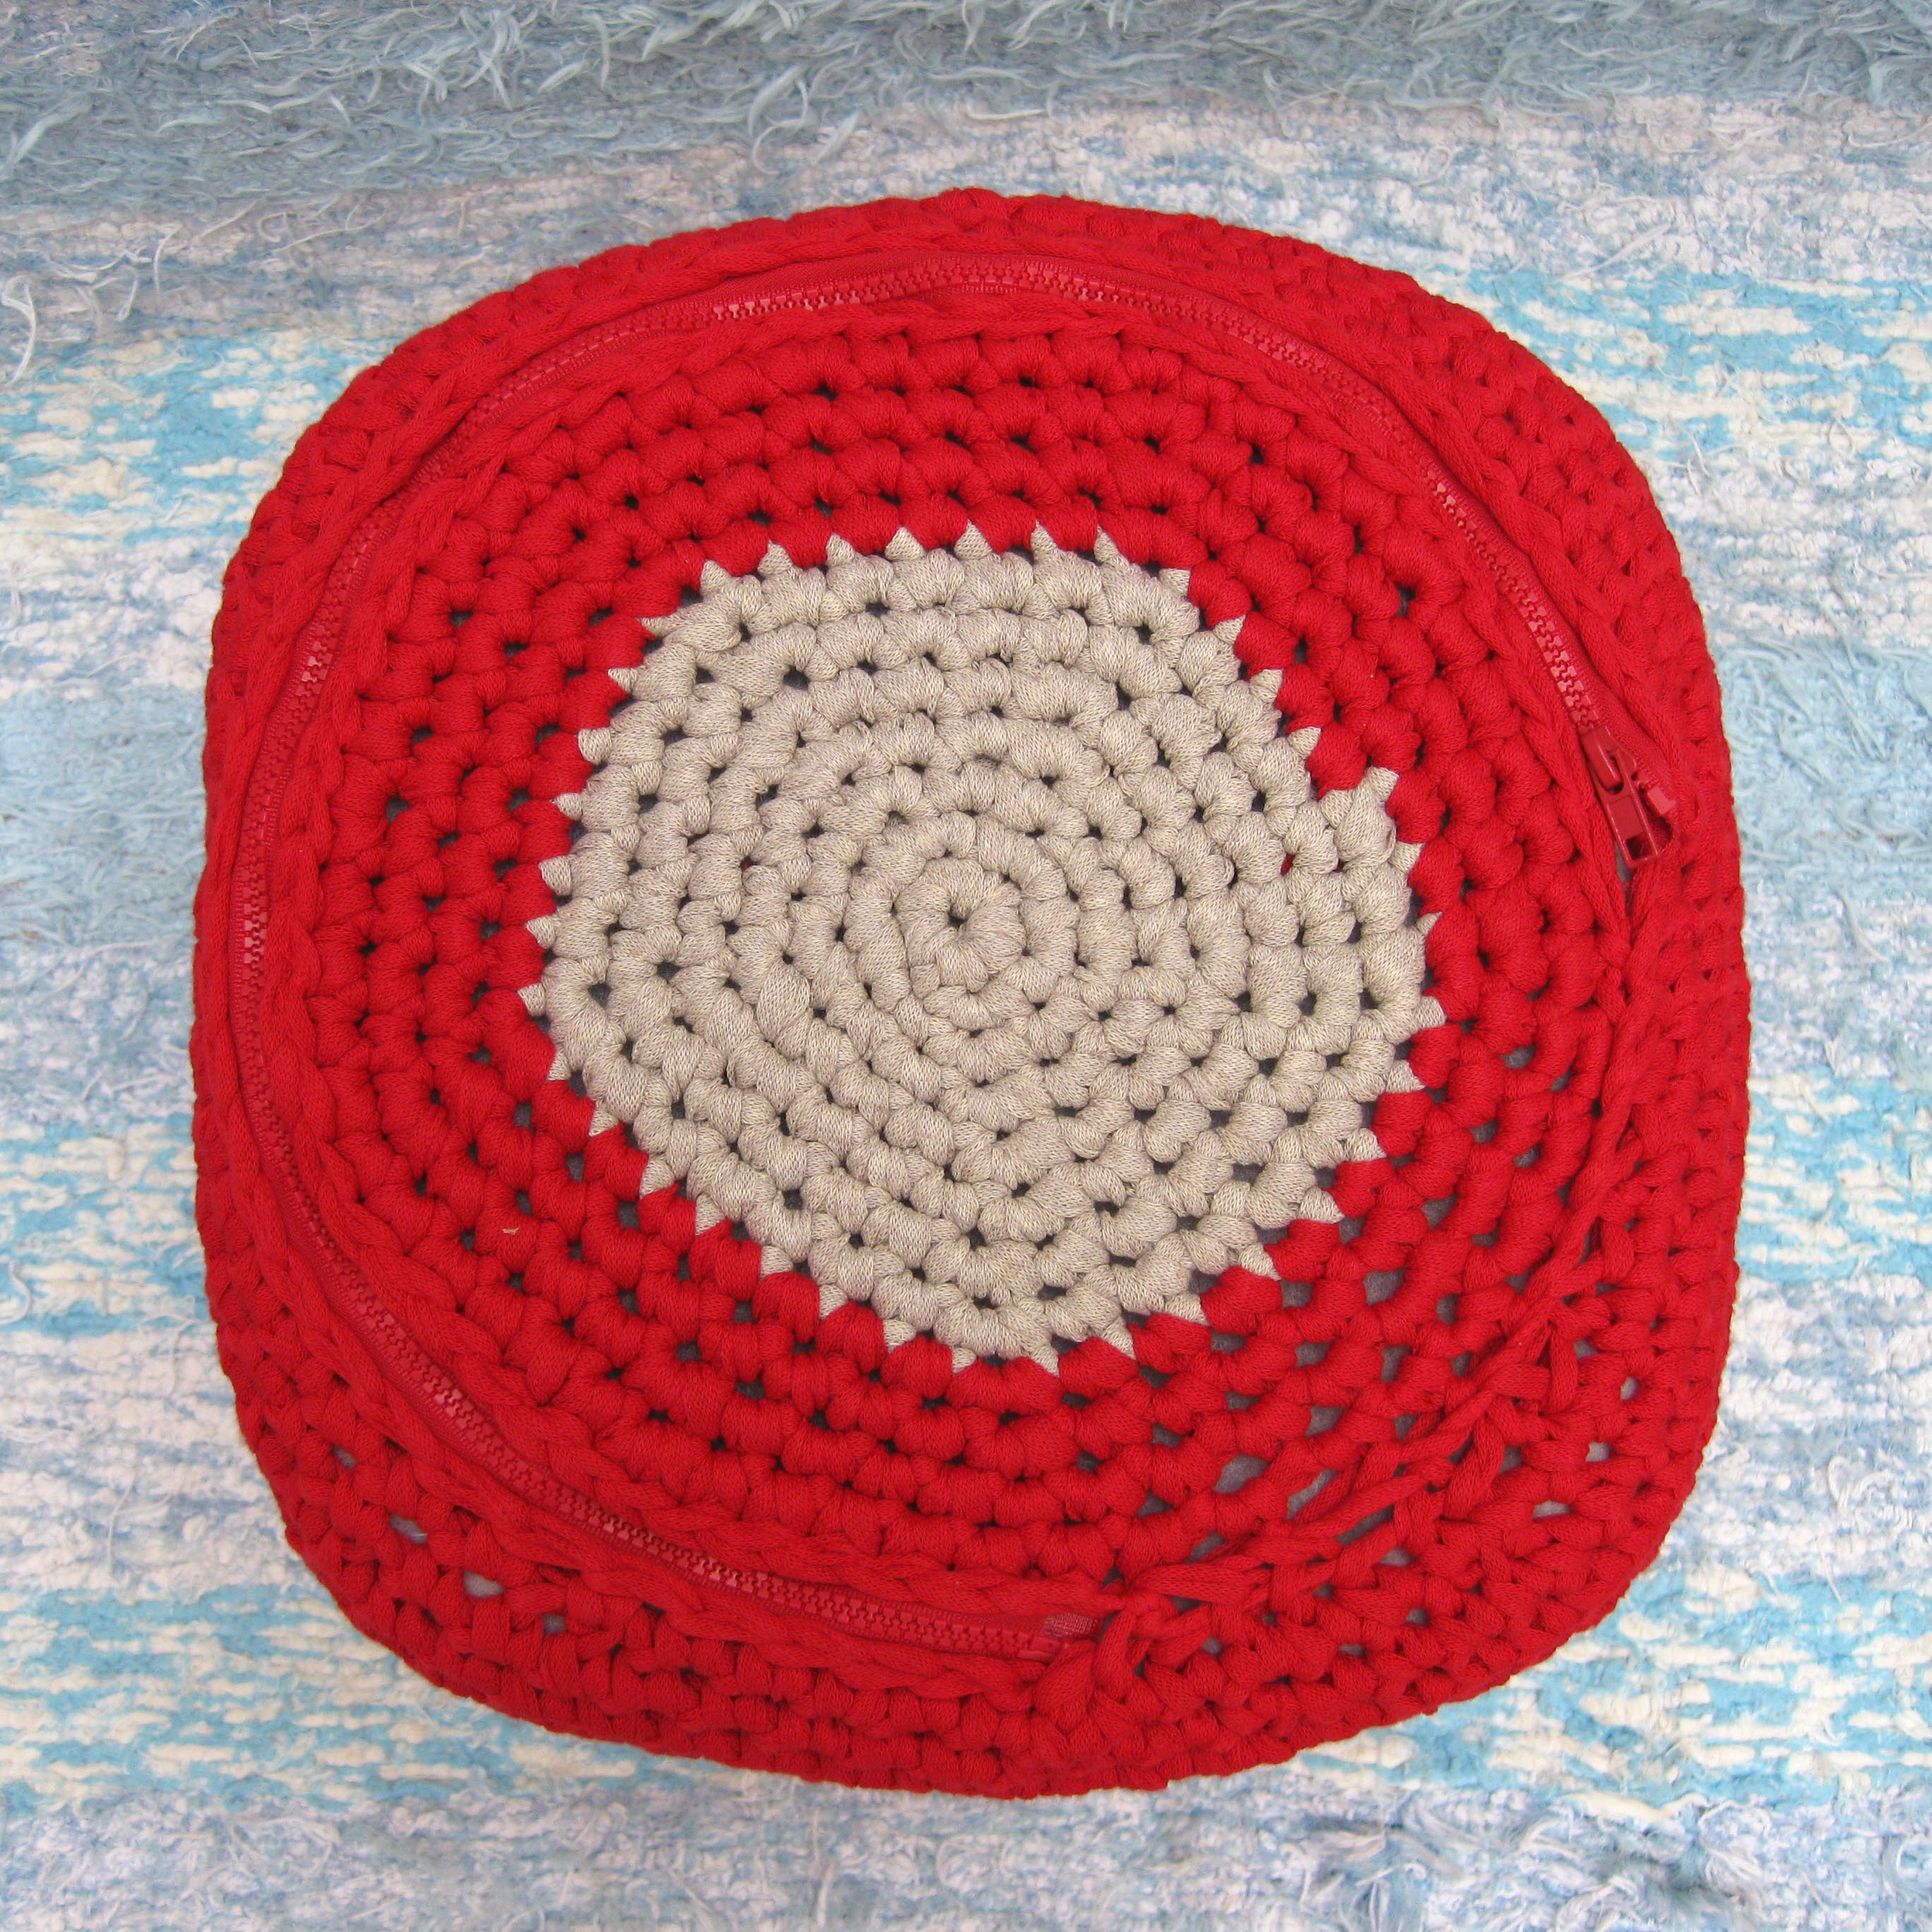
At the bottom I have made a flap so I can open it and take out the cover to wash it..
To knit the bottom placket, we will follow the same steps as for the supurio:
In my case, I used what was left of the beige color for the bottom placket so as not to start another ball of cloth.
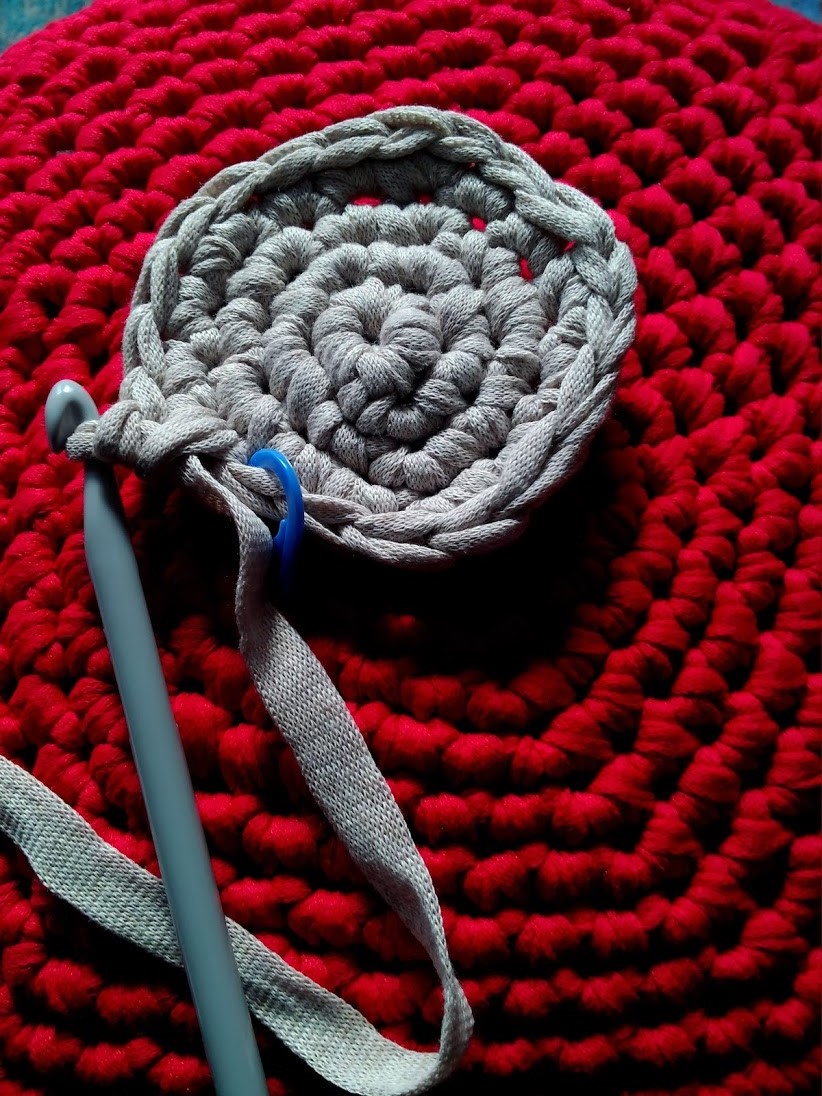
V1: magic ring 5 points.
V2: 1 Increase in each point (10p).
V3: 1 Pb and an increase throughout the round (15 p).
V4: 2 Pb and an increase throughout the round (20 p).
V5: 3 Pb and an increase throughout the round (25 p).
V6: 4 Pb and an increase throughout the round (30 p).
V7: 5 Pb and an increase throughout the round (35 p).
V8: 6 Pby an increase throughout the round (40 p).
V9: 7 Pb and an increase throughout the round (45 p).
V10: 8 Pb and an increase throughout the round (50 p).
V11: 9 Pb and an increase throughout the round (55 p).
V12: 10 Pb and an increase throughout the round (60 p).
Making:
Sew the zipper to the placket and pouf cover. Sew them 12 points shelves from the bottom placket to the beanbag cover.


very good idea!!! congratulations!!! I'll get to work!!!!….
how wonderful!!!!!!
Hola
You just have to place more bottles and give the cover the shape you need.