

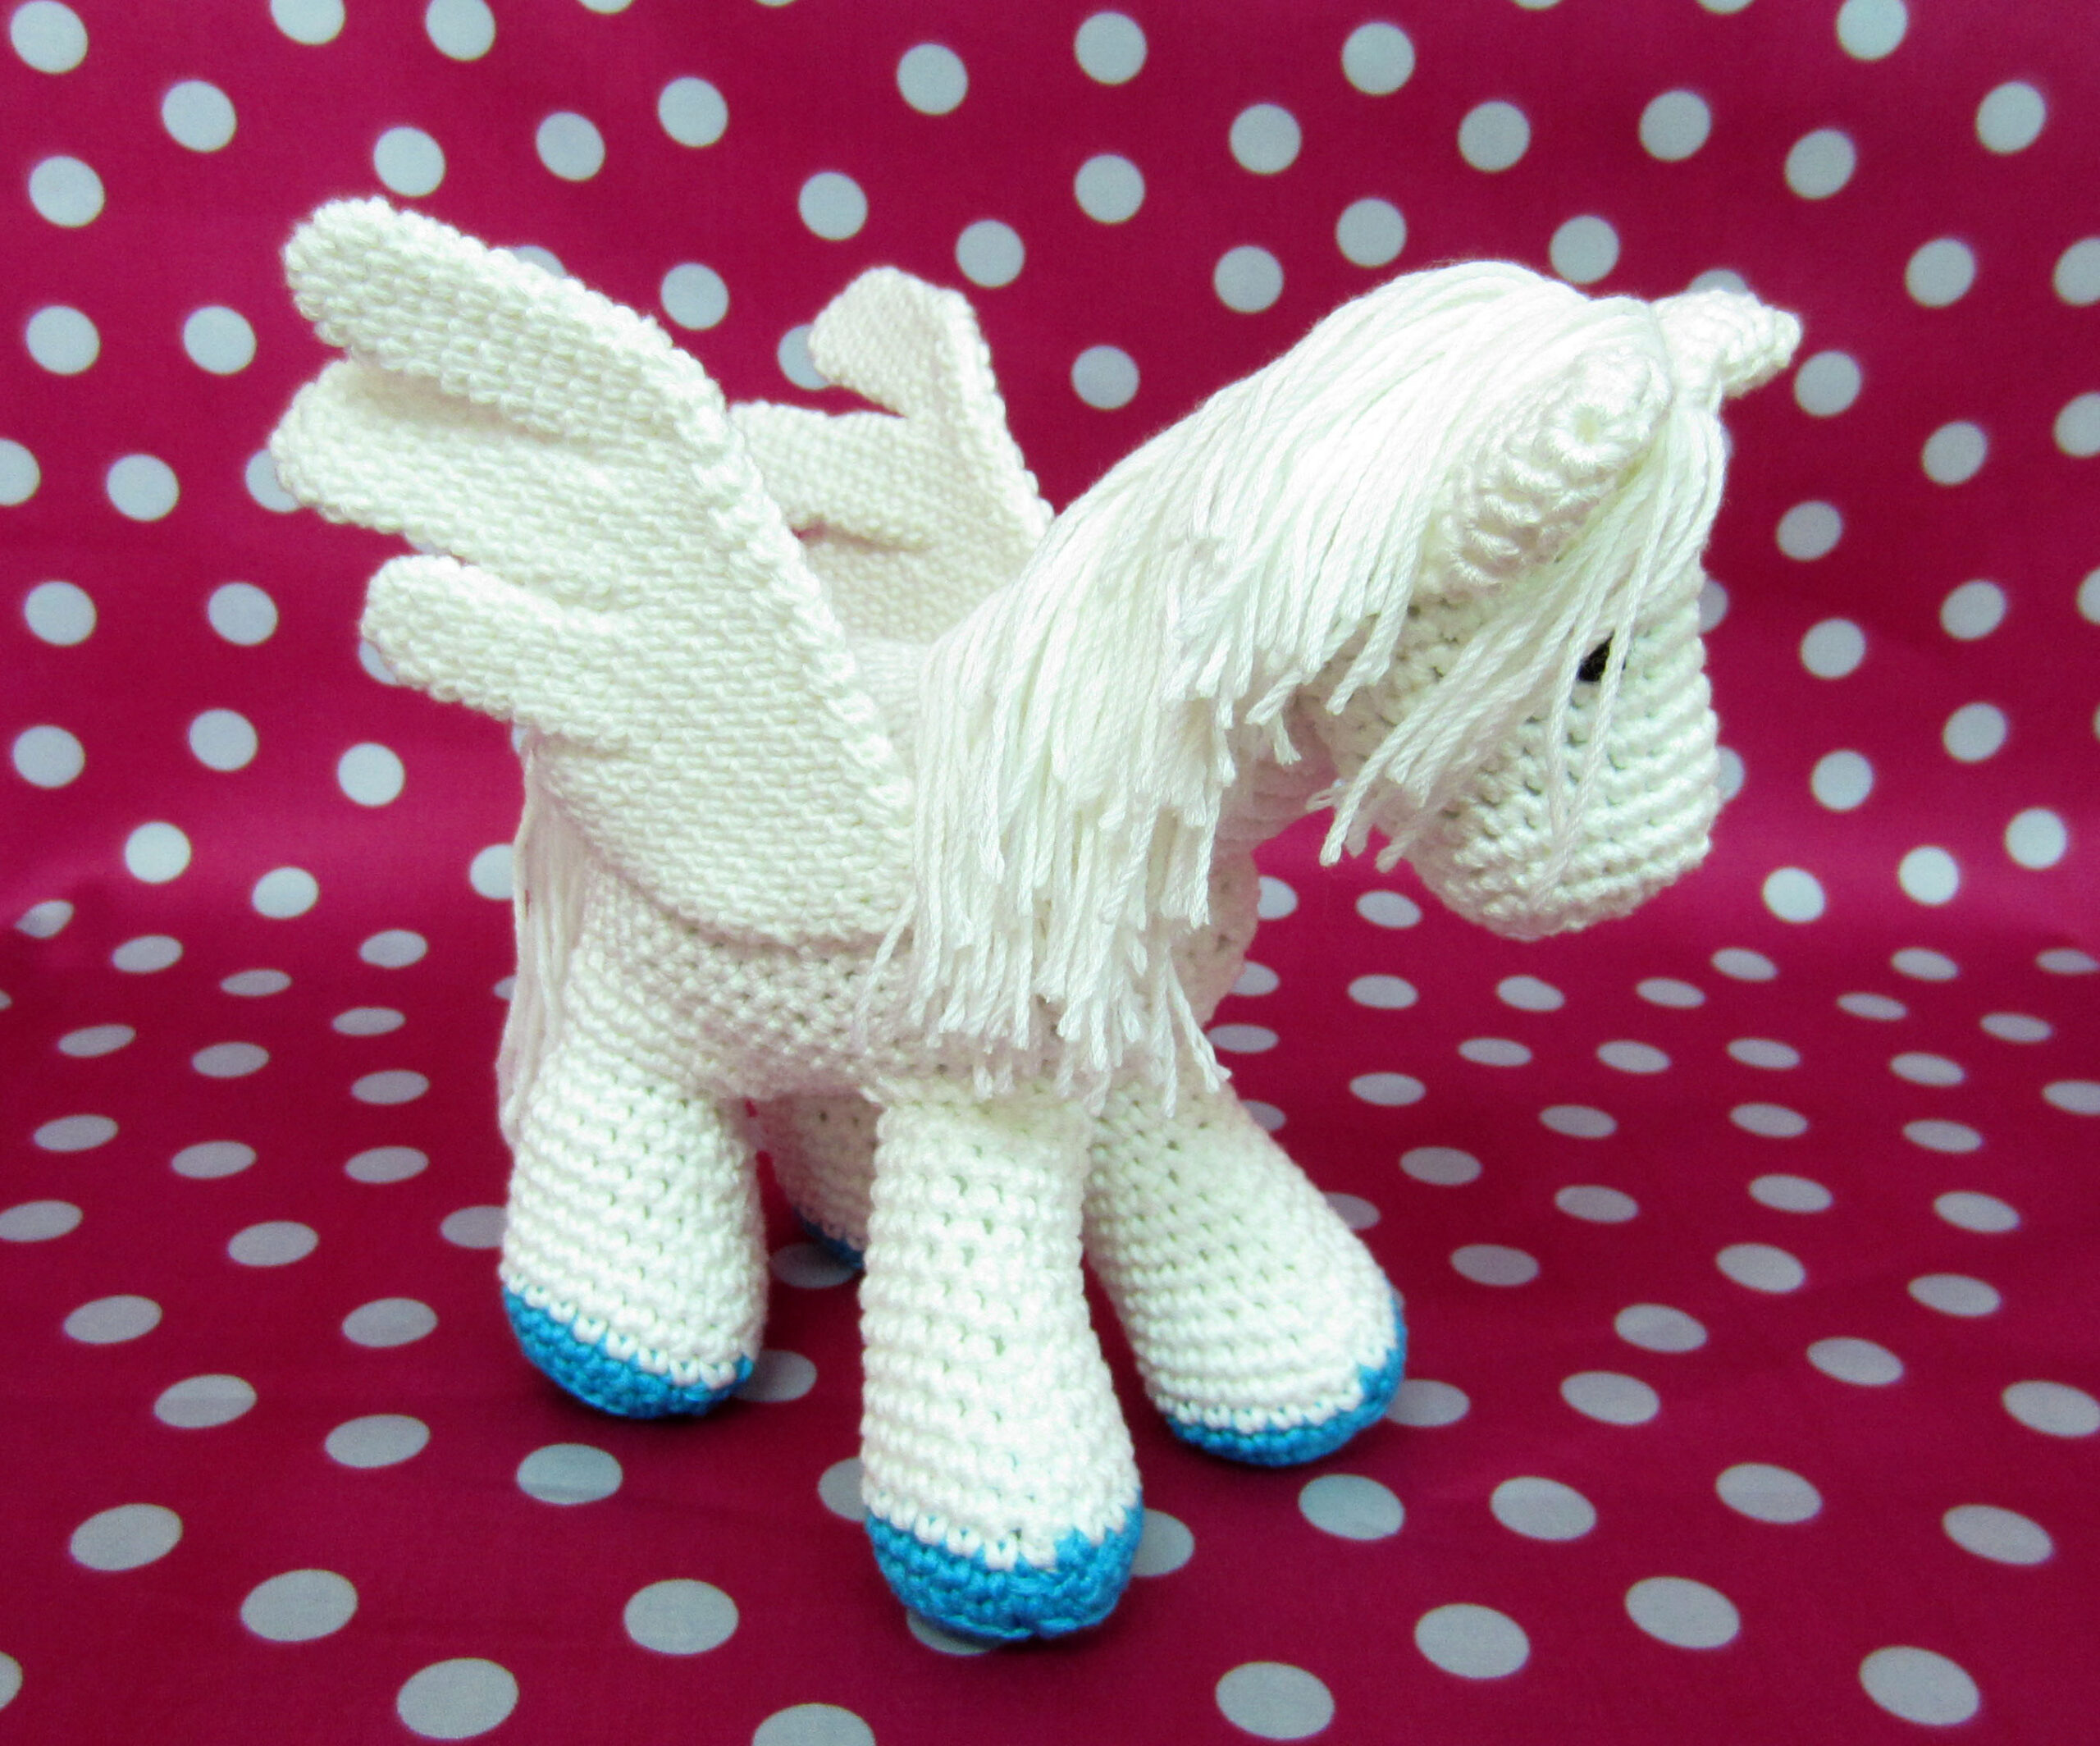
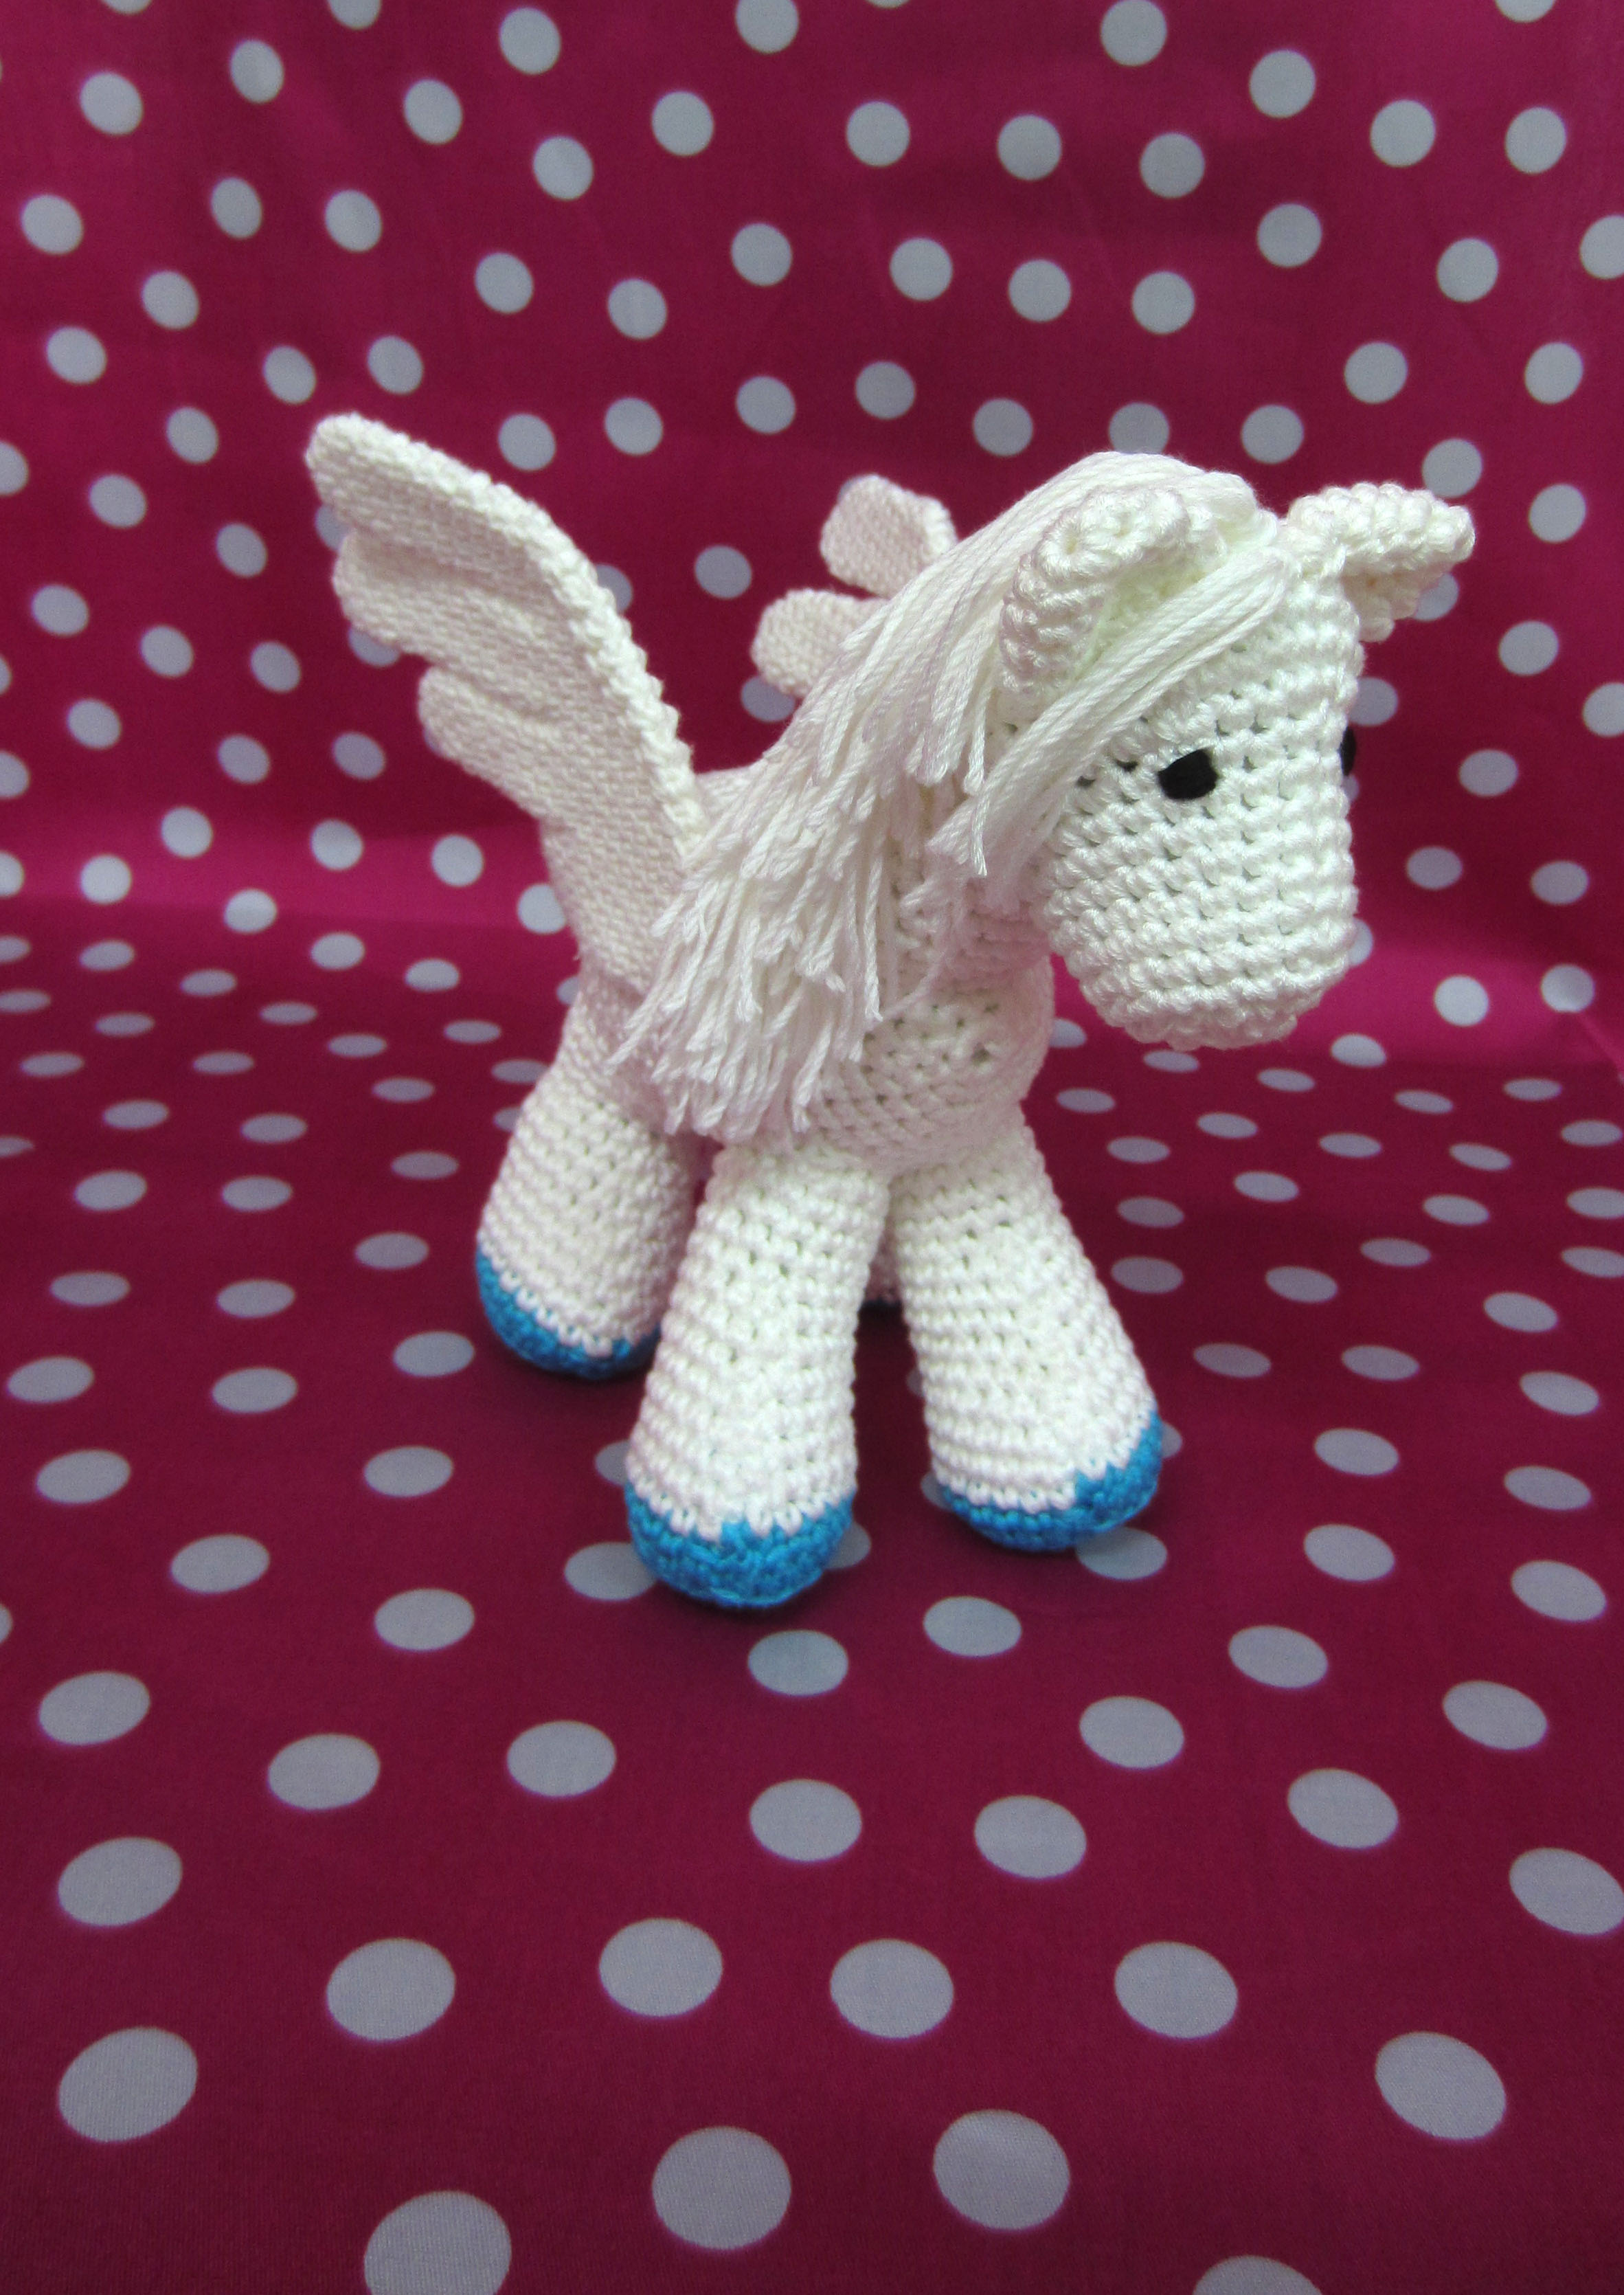
Next we will see how to crochet this horse with wings..
Materials:
-crochet needle 3,5 mm
-Blue cotton thread, black and white.
-Wool needle for sewing.
-Bookmark so we don't get lost.
-Wadding for the filling.
-Scissors
-interfacing of two guys.
Achievement:
Head:
V1: magic ring 6 points.
V2: 1 Increase in each point (12p).
V3: 1 Pb and an increase throughout the round (18p).
V4: 2 Pb and an increase throughout the round (24p).
V5: 3 Pb and an increase throughout the round (30p).
V6: 4 Pb and an increase throughout the round (36p).
V7-V9: Pb throughout the round (36p).
V10: 4 Pb y 1 decrease throughout the round (30p).
V11: 3 Pb y 1 decrease throughout the round (24p).
V12-V15: Pb throughout the round (24p).
V16: 4 Pb y 1 decrease throughout the round (18p).
Fill with batting.
V17: Pb throughout the round (18p).
V18: 2 Pb y 1 decrease throughout the round (14p).
V19: 1 Pb y 1 decrease throughout the round (7p). Sew to close.
Ears:
Knit two.
V1: magic ring 6 points.
V2: 1 Pb and an increase throughout the round (9p).
V2: 2 Pb and an increase throughout the round (12p).
V4: 3 Pb and an increase throughout the round (15p).
V5: 4 Pb and an increase throughout the round (18p). Leave a long strand left over.
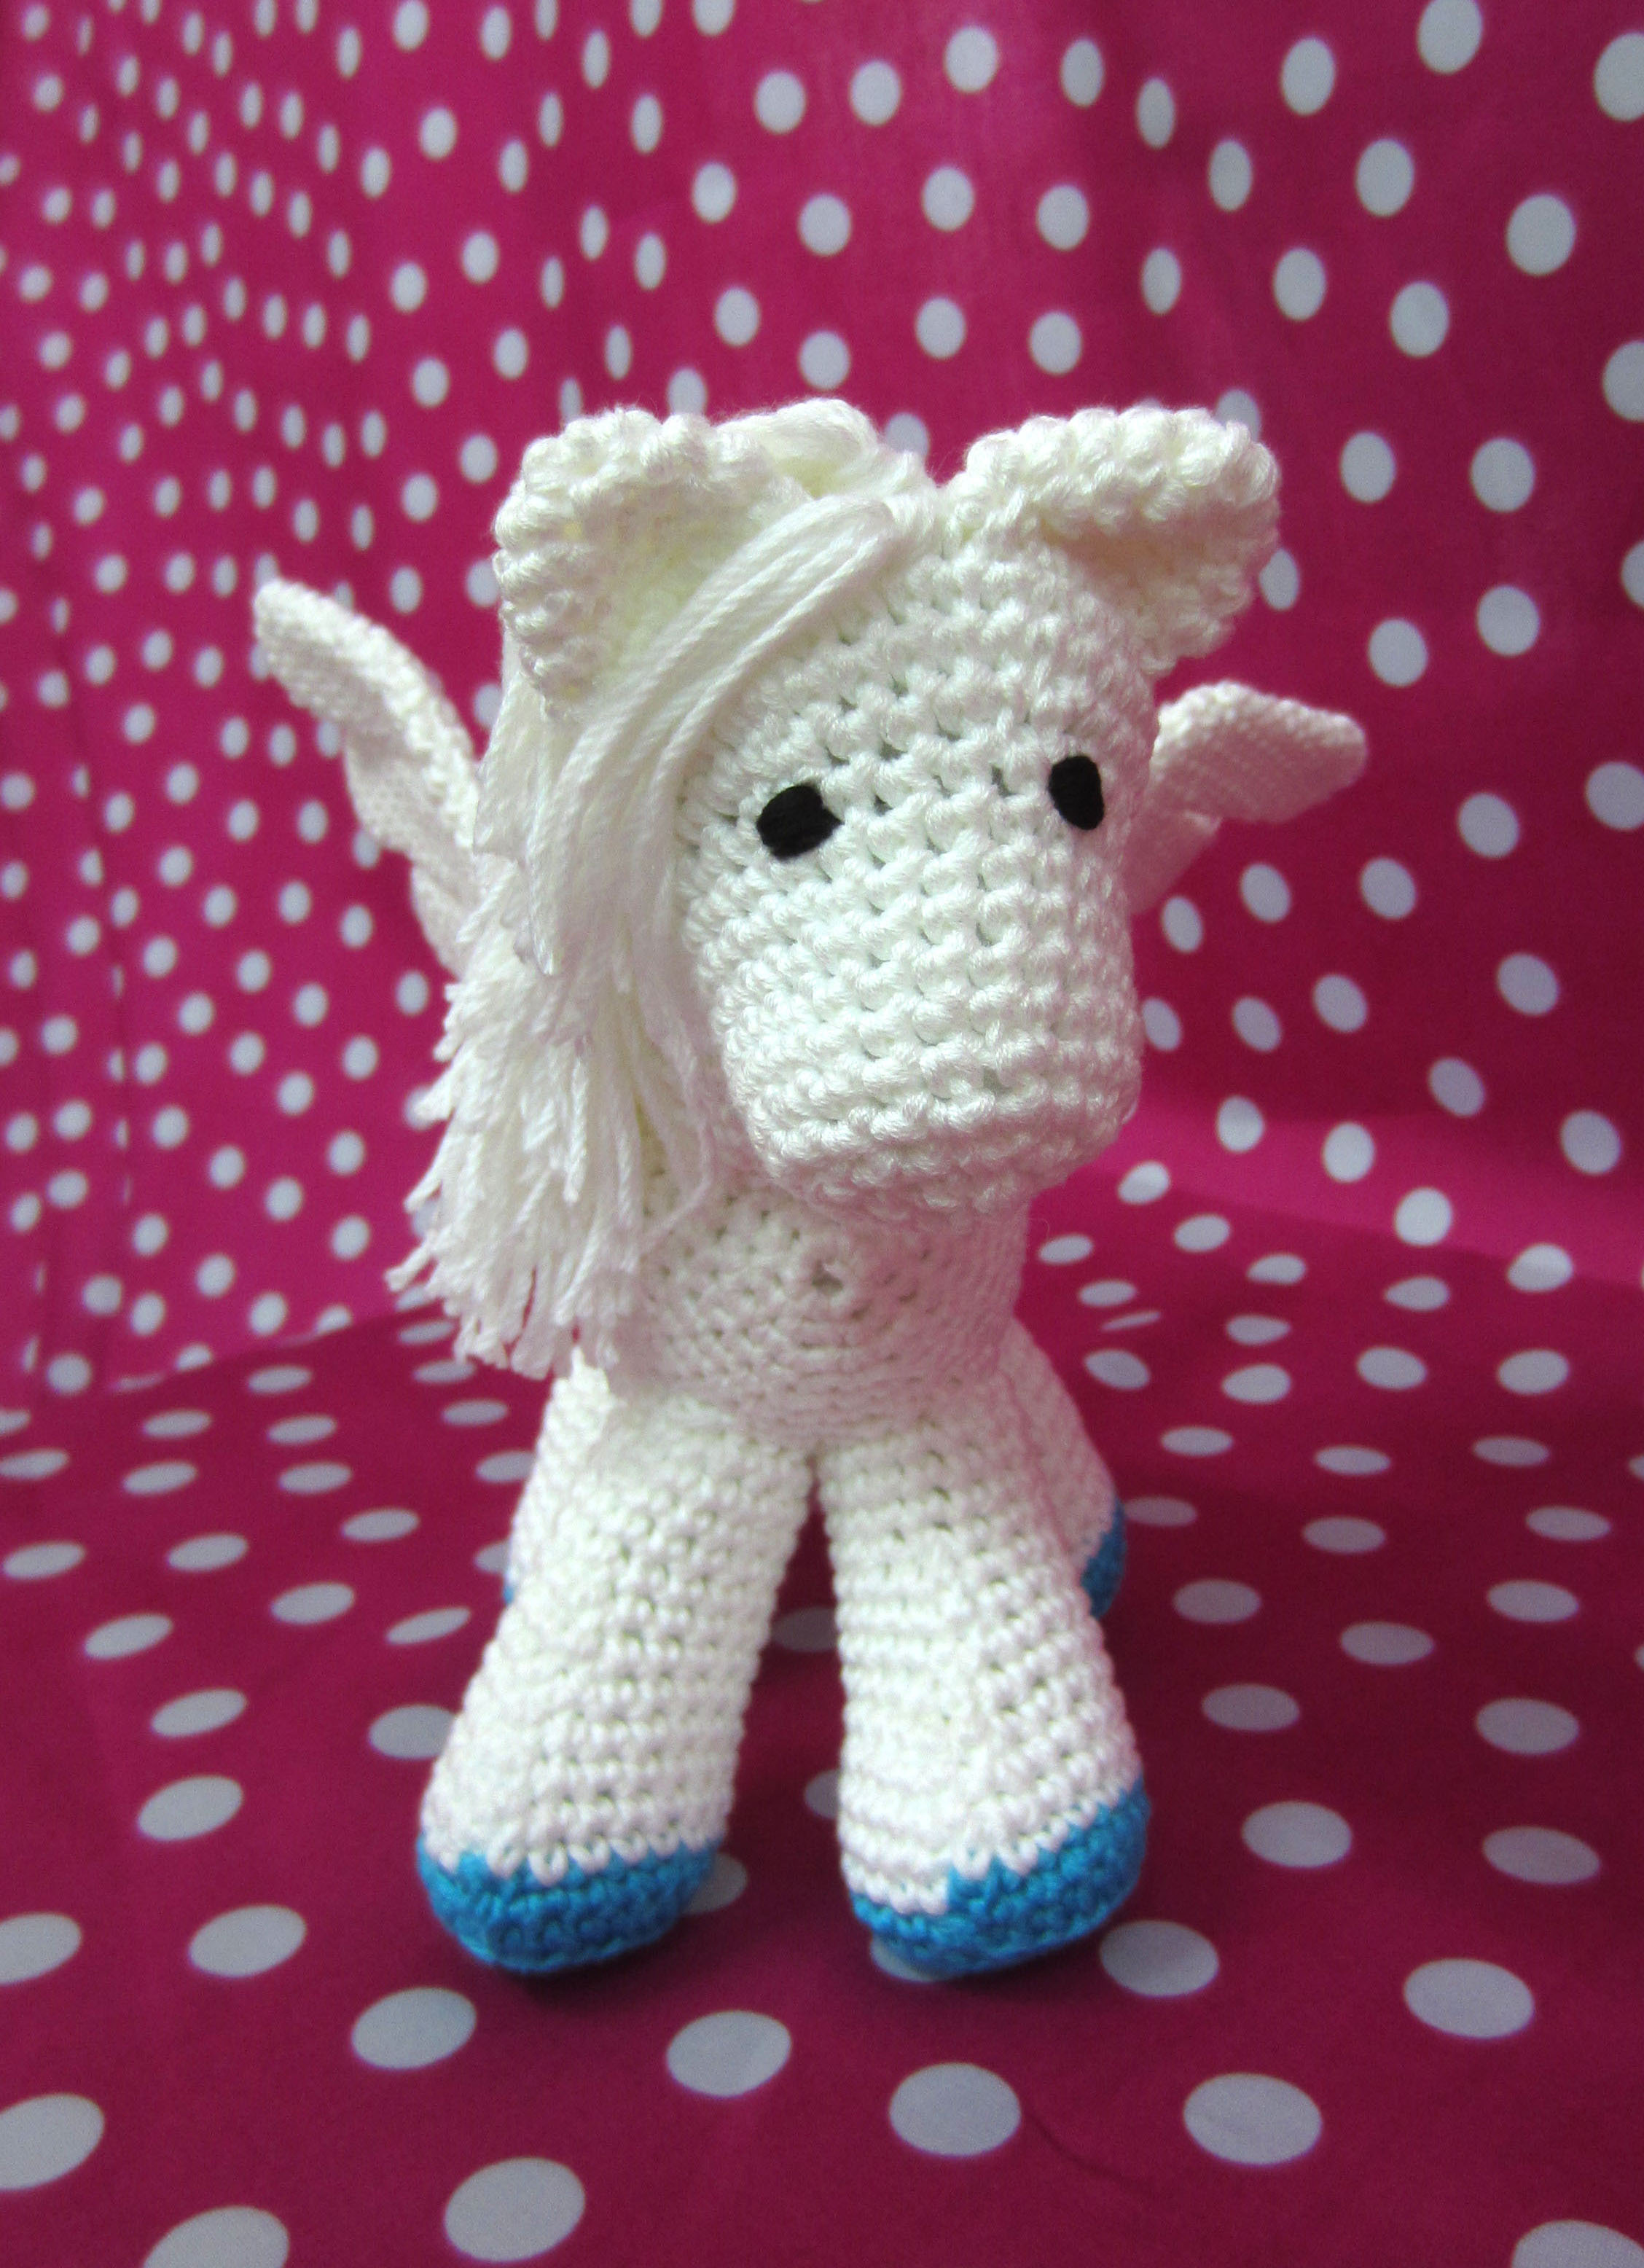
To sew them to the head, It is important to take into account the curved shape they have from the base.
Neck:
Knit a chain of 21 p and join with the beginning with a single crochet.
V1: Pb throughout the round.
V2: 5 Pb, 10 Pa, 5 Pb
V3: Pb throughout the round.
V4: 5 Pb, 10 Pa, 5 Pb
V5: Pb throughout the round.
V6: 5 Pb, 10 Pa, 5 Pb
V7: Pb throughout the round. Close.
Body
V1: magic ring 6 points.
V2: 1 Increase in each point (12p).
V3: 1 Pb and an increase throughout the round (18p).
V4: 2 Pb and an increase throughout the round (24p).
V5: 3 Pb and an increase throughout the round (30p).
V6: 4 Pb and an increase throughout the round (36p).
V7-V18: Pb throughout the round (36p).
V19: 4 Pb y 1 decrease throughout the round (30p).
V20: 3 Pb y 1 decrease throughout the round (24p).
Fill with batting.
V21: 2 Pb y 1 decrease throughout the round (12p).
V22: 1 Pb y 1 decrease throughout the round (6p).

front legs
Weave 2.
We start with blue thread.
V1: magic ring 6 points.
V2: 1 Increase in each point (12p).
V3: 1 Increase in each point (24p).
V4: Sc throughout the round but taking only the inside part of the chains (24p).
V5: Pb throughout the round (24p).
V6: Pb y 1 decrease in the last point (23p).
We change the thread for the white one.
V7: Pb y 1 decrease in the last point (22p).
V8: Pb y 1 decrease in the last point (21p).
V9: Pb y 1 decrease in the last point (20p).
V10: Pb y 1 decrease in the last point (19p).
V11: Pb y 1 decrease in the last point (18p).
V12: Pb y 1 decrease in the last point (17p).
V13: Pb y 1 decrease in the last point (16p).
V14-V16: Pb throughout the round (16p).
hind legs
Weave 2.
We start with blue thread.
V1: magic ring 6 points.
V2: 1 Increase in each point (12p).
V3: 1 Increase in each point (24p).
V4: Sc throughout the round but taking only the inside part of the chains (24p).
V5-V6: Pb throughout the round (24p).
We change the thread for the white one.
V7: Pb throughout the round (24p).
V8: Pb y 1 decrease in the last point (23p).
V9: Pb y 1 decrease in the last point (22p).
V10: Pb y 1 decrease in the last point (21p).
V11: Pb y 1 decrease in the last point (20p).
V12: Pb y 1 decrease in the last point (19p).
V13: Pb y 1 decrease in the last point (18p).
V14: 1 Dec, 5 Pb, 2 dec, 6 Pb (15p).
V15: 6 Pb, 3 aum, 6Pb (18p).
V16: 7 Pb, 3 aum, 8Pb (21p).
V17: 9 Pb, 3 aum, 9Pb (24p).
V18: Pb throughout the round (24p).

Alas:
Weave 2.
To make the wings, we will first weave the feathers separately and then we will join them to the wing assembly..
Feather 1:
V1: Anillo mágico from 6p.
V2: 1 Pb and an increase throughout the round (9p).
V3-V5: Pb throughout the round (9p).
Finalizar y rematar el hilo.
Feather 2:
V1: Anillo mágico from 6p.
V2: 1 Pb y un aumento durante toda la vuelta (9p).
V3-V9: Pb throughout the round (9p).
Cerrar y rematar el hilo.
Feather 3:
V1: Anillo mágico from 6p.
V2: 1 Pb y un aumento durante toda la vuelta (9p).
V3-V13: Pb throughout the round (9p).
Cerrar y rematar el hilo.
Feather 4 and wing body:
V1: Anillo mágico from 6p.
V2: 1 Pb y un aumento durante toda la vuelta (9p).
V3-V12: Pb throughout the round (9p).
Cerrar y rematar el hilo.
V13: 4 Pb; continuando pluma 3, 9 Pb; de nuevo en el cuerpo del ala, 3 Pb, 1 dism con los dos últimos puntos (17p).
V14: 8 Pb; continuando en pluma 2, 9 Pb; de nuevo en el ala principal, 7 Pb, 1 dism con los dos últimos puntos (25p).
V15: 13 Pb; continuando pluma 1, 9 Pb; de nuevo en el ala principal, 10 Pb,1 dism con los dos últimos puntos (33p)
V16: 1 dism, 29 Pb, 1 dism (31p).
V17: 1 dism, 27 Pb, 1 dism (29p).
V18: 1 dism, 25 Pb, 1 dism (27p).
V19: 1 dism, 23 Pb, 1 dism (25p).
V20: 1 dism, 21 Pb, 1 dism (23p).
V21: 1 dism, 19 Pb, 1 dism (21p).
V22: 1 dism, 8 Pb, 1 dism, 7 Pb, 1 dism (18p).
V23: 1 dism, 6 Pb, 1 dism, 6 Pb, 1 dism (15p).
V24: 1 dism, 5 Pb, 1 dism, 4 Pb, 1 dism (12p).
V25: 1 dism, 3 Pb, 1 dism, 3 Pb, 1 dism (9p).
V26: 1 dism, 1 pb, 3 dism (5p).
Cerrar y dejar la hebra larga para coser.
Preparation and finishing
To finish, The parts should be sewn as follows:
Sew the ears to the head and the head to the neck. Fill the neck with batting and sew it to the body. Fill the legs with batting and sew them to the body.
For the tail I made a tassel with white threads. For the mane they are first cut 4 threads of some 15 cm long. They hold the 4 threads for half their length with the hook and prick at a point on the head or neck. Finally, The threads are passed through the gap that is formed between the hook and the point that we have pricked, and press hard. In this same way, crochet fringes are usually placed on a shawl or scarf..
Repeat the process as many times as we want the leafy mane.
I have only put eyes on his face, embroidered with black thread.
Besides, So that the wings would remain rigid, I decided to put interlining that sticks on both sides on the inside of the wings and before sewing them, I ironed them..

Hello dear, the pasting is very beautiful, I wonder if there is a video about this work?…greetings and congratulations
Hola, I'm sorry but there is no video.
I hope to make them soon.
Kisses!
Beautiful work! Thanks for sharing the pattern
Hello my dear… first of all congratulations for this EXCELLENT JOB Bravo!!!!
Thank you very much for sharing and I promise I will do it.. It's great!!!
You are an Artist!!
See you soon… Cris
Thank you very much for your nice words!
It's very cool!
Gracias!
As soon as I finish a little frog that I'm doing, this beautiful pegasus begins,, I loved it!!! thanks for sharing the design
I didn't understand how the wings are made , could you send something more explicit ? This is beautiful I want it for Julieta my granddaughter, thank you so much! 🙂
Hola, What exactly don't you understand?? I will try to explain it to you.
Very cute Pegasus and also original!!! Thanks for sharing the pattern, I'm going to do it.
Great, thanks to you!
hellooo,I have a big problem with the pegasus, the wings, I can't understand how they are attached. I already made the feathers but I don't know how to continue to attach them to the body of the wing.!!!help x pleaserrrrrrr
Hola, don't worry you will do very well!
I understand that you already have the pen 4 finished (you have already made the return 12). Now you knit 4 low points of the same wing (ala 4) and you join it to the puma 3 knitting the 5th single crochet in any point of the feather 3. You turn this all the way around to low point and click on the pen again 4. You do 3 low points in pen four and a decrease. This way you will have reached the starting point but now you have two feathers joined together.
This same process is repeated for the others.
If you have any questions, contact us again.
Kisses!!!
Hello, good afternoon, this creation is very beautiful, I congratulate you, it is INCREDIBLE. I live in the beautiful port of Veracruz., I loved this pegasus but the only thing I don't understand is how to make the wings. Could you tell me where I can be in more contact with you so you can guide me on how to weave the wings?, Thank you, nice afternoon and God bless you.
Hola, you can contact us at elhogardelaslanas@gmail.com. But look in Pegaso's comments that I have explained it better.
kisses and thanks!
hello, I have noticed an error, I don't know if mine or yours, but the beads don't come out on the wings if I make two stitches and an inc on the first round after the magic ring they don't come out 9 points, On the other hand, if I make a point, an increase, yes. what is right?thanks in advance
You are absolutely right, thank you very much for reporting the error. I change it right now.
I loved your pegasus! Congratulations! Very generous in sharing the pattern! I'm trying to make it for my one and a half year old daughter., and when I get to the neck I have the doubt if pa is half double crochet or double crochet. Could you help me? Thank you so much!!!
Hola
Thanks for your comment. Half double crochet is used when you find “Pa”, that is to say, you use two chains to raise the round. A hug!
Hello, your pegasus is very pretty., I am doing it for my granddaughters who are three girls., I already have everything knitted but I can't join the feathers if you could explain each of the feathers please,get to where you pasted the first two , please….I will appreciate it very much…
The rest of the feathers are made the same as the first two. What part don't you understand??
I did it , everything turned out perfect, The bad thing is that I didn't put the interlining on the wings. , It will be for the next one I do…. thanks for sharing it…
Good day , just to thank you for your sensitivity in sharing this beautiful work that gives the possibility to those of us who need a pattern to be able to do it, especially when we are just starting out and our knowledge is very basic , thank you very much for your generosity
In the hind legs the turns 15, 16, 17 I don't understand then 3 the same three increases are worked but then where do they fit … Me explico v.15=6p 3aum,6 p
V16= 6p, 3 aum, 6p. v17=6p, 3 aum, 6 p. But where do they still go?. From every turn?
This pegasus is cute, I'm doing it but on lap 14 it doesn't work for me 15 I have points left 14 I count the points well but it gives me 14 always
I forgot to say that it's the back legs that don't hurt me. 15 in the return 14 it gives me 14 please help
Hola, sorry.
You were right there was a mistake but I have already solved it.
Please review it and if you have any problems do not hesitate to contact me.
A hug!
Hello, thank you for responding so quickly but I have another problem on the way back. 15 remain 18 pts but in the turns 16,17,18 It is done in the same way as 15 and it doesn't work out if I increase one sc on each side per round it gives me. A hug and thank you for sharing the patterns. I'm just starting out in this and it's a very good therapy for stress.
Hola, the turns 16, 17 y 18 they are fine, when doing 3 increases will increase the number of points but it is true that I have not increased the sides.
Sorry, it's already fixed.
A hug!
This is beautiful, my daughter loved it .
Hello! I thank you very much for the pattern. It's beautiful. Here is the link of how it turned out for me. The owner is very happy. Greetings!
http://ravel.me/ragazzaj/mlpfim
Hola
It turned out beautiful on you. I love.
Thanks for sharing it.
A hug!
Thank you so much! Greetings!
I don't understand how to put the wings together
Gracias
You mean how to stick them to the body?
Thank you very much for sharing the pattern!!!
Beautiful, Please, I'm a beginner and I would love to make one for my baby., you can make a video tutorial 🙏🙏🙏, gracias!
Your work is beautiful, thank you for sharing it.
Thanks for sharing the pegasus
Thank you very much, very well explained
Hola !! Beautiful work, I just finished it and I loved it… thank you very much for sharing the pattern, saluditos✌.